Award Ribbon Construction
These special award ribbons are not complicated to make. An ink jet printer, t-shirt transfer material, a couple of CD's, ribbon, fabric, a bit of batting plus a needle, thread, and a touch of glue are required. As promised, the instructions are in this post. A version of them may be downloaded as a PDF file HERE so they can be printed.

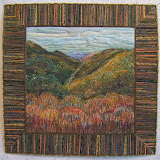
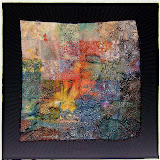
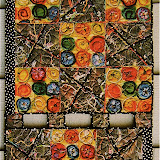
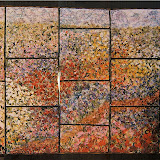
Some of the rosette quilts are pieced and some are whole cloth. Some are quilted by hand and others by machine. The stitched fabric is layered with a light-weight batting.


After the first award is printed, cut it the width of the satin ribbon from the center of the large transfer sheet. (To use the cut away side pieces, place each one down the center of a plain sheet of paper. Use double-sided tape to adhere the backside of the transfer sheet to the leading edge of the plain paper going into the printer. After printing cut the transfer to the width of the ribbon.
Iron the printed transfer to satin ribbon cut longer than the transfer. Use a HOT iron and press cloth.


NOTE: I now print directly on the ribbon. The print is not reversed for this process. The ribbon is affixed to the center of a cardstock weight piece of paper with double stick tape at the top and bottom. It is necessary to top feed this sheet through the printer. This one taped paper can be used multiple times.
I also fuse another layer of ribbon to the printed one to give more body to it. I suspect the heat of the iron during the fusing sets the ink into the ribbon. There has been no fading to ribbons printed two years ago.
For the backing cover a second CD disc. Cut a circle of backing fabric larger than the CD. Cut and glue a piece of batting into the center. This is to fill the space between the front and back created by the gathered fabric edges.
 Hand sew a row of basting stitches around the edge and gather it to cover the CD form.
 If a RUFFLE is desired, make and attach it at this point. Gather up a length of ribbon that is twice as long as the circumference of the CD with two rows of machine basting stitches (may be down the center of a wide ribbon for a double ruffle or along an edge of a narrower one for a single ruffle). Gather the ruffle to fit the outside edge. Stitch it to the edge of the rosette front using a blind stitch.
Attach the printed ribbon to the seam allowance on the backside of the rosette front with a straight pin that has a tiny head (it will stay there).
 Cut lengths of gross grain ribbon. Arrange and attach them with pins to the seam allowance of the rosette.
 Match the covered back to the front of the rosette. Use a few pins to temporarily hold in place.
 Blind stitch them together with a matching thread. Begin on one side of the ribbons. Catch the stitches only through the gross grain ribbon ... do NOT stitch through to the printed satin one,.
 Continue stitching around the rosette. I like to use a curved needle and the ladder stitch (running stitch in alternate layers). A straight needle and a regular blind stitch may be used.
 The ribbons in our show hang from large safety pins attached to display curtains next to the winning quilts. Card board backings with a metal hanger made for award ribbons are ordered through a trophy store. If none are available to you, they can be made with cereal box weight cardboard and a paper clip. Cut a slit and slide the small end of a large clip to the backside of the cardboard backing.
 Attach a backing with a smear of glue over the entire surface of the cardboard to the back side of the rosette. Either clip or weigh down the backing while it dries.
 I hope you have as much fun designing and constructing beautiful ribbons as I have for the last two years. I even made one as this years valentine for my husband.
 In 1994 he was judged to be the "World's Greatest Elvis Fan" by Graceland and the Hasbro Toy Company. His winning essay didn't get him much recognition, so I thought he at least deserved a nice big award ribbon.


7 comments:
Lovely mini quilts you made for the rosettes. I never thought how the award ribbons were made but now i know :). Thanks for sharing.
Thanks for this, Nellie. I made ribbons for our show last year, using a very similar method for the center of the rosettes. I'm very happy to have the info on how to make a printed ribbon though. I'd been thinking about doing that next time, but hadn't quite worked out a good method.
Forgot to add that some word processing programs and Adobe Illustrator will print letters in vertical format so that the same document contains more than one, and they'd all go on a single page. At least I think so, but maybe you've tried that, and it didn't work.
Once again your creativity blows me away. So glad I found your blog. I will be attending an AQS show this weekend and will look closely to see how their ribbons are made. Yours are fabulous.
Nellie, I saved this tutorial when you posted it because I had a feeling it would come in handy. And it DID! I just finished making a ribbon/button for the parade Grand Marshal to wear when we have our annual festival next month. It was fun to make and your tutorial made it SO easy. You can see a pic on my blog at http://newsfromthebasement.blogspot.com
Thanks so much
That is awesome!!
Thanks for this fabulous tutorial Nellie. I just finished making four ribbons for my Guild quilt show this weekend and they turned out beautifully. I didn't have enough CDs for front and back so I used cardbord cut the size of CDs for the backing and it worked just fine.
Post a Comment