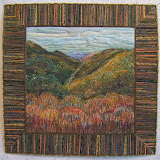
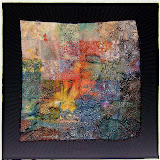
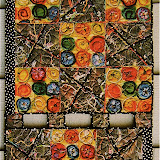
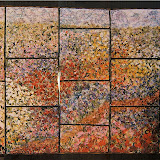
"A way to minimize the tyranny is to see your art in a state of adjustment and creative development, rather than trying to fulfill some preconceived vision. I call it 'dynamic painting' and it's quite magical. It could be called "dynamic writing" or even 'dynamic living'."
That is a quote from a Robert Genn's newsletter. It came earlier this week just before I conducted a day-long workshop on Thursday sharing my method of creating art quilts from scraps. I hadn't realized there was a name for how I work. I think of it as having a dialog with the piece, or even just playing. At any rate, sharing the way I create was my primary goal.
I was pleased how each participant "got" the dynamic way of creating ... choosing one scrap from the pile in the middle of the table that caught their eye and building a piece around it ... they all played like 6-year olds. No one seemed to notice the cold, rainy, dreary day outside.
 I hadn't taught a workshop in so long, there was trepidation about getting into the "flow". However, that interaction with students and responding to situations as they come up was still there without missing any steps in my lesson plan ... whew! The one decision I was a bit worried about was that instead of my demonstrating on my own machine, I walked several students through the featured process on their machines with the others looking on. It worked! The machine owner could ask questions or verbalize during my instruction which helped her and everyone else to really "get it" ... another whew!
 In the photo above Martha is going through the steps to determine settings and adjustments for using Bottom Line thread on a prewound disposable bobbin. I suspect there are a few converts to this product available from Superior Threads. BL thread is a fine thread which requires a change in the bobbin case tension ... something many consider to be a NO-NO. Also, bobbin cases vary in depth which means that one or both cardboard sides may have to be discarded so the bobbin rotates freely in the case. Go here (Superior's education site) to learn more about bobbin tension adjustments and prewound bobbins.
Also, introduced was the use of Superiors Polyester monofilament invisible thread as the top thread in machine quilting. It's soft and heat resistant and comes in Clear and Smoke. I use it when I don't want an obvious quilting thread or color to be a design element in a quilt. Often, just a quilting pattern works best with complex and detailed small compositions. The main trick for working with monofilament is lowering the top tension to "0" ... or nearly so. Also, the thread is straight wound onto the spool as opposed to a criss-cross wind, thus it's meant to feed off the spool on an upright spindle. Care must be taken that the thread doesn't reel off the spool too fast or freely.
Here's a series of photos from beginning to end for Carol's piece, one of the ladies who had never dreamed of working this way.
 She had brought big scraps of that jungle print. She did a good job of snipping it into bits and rearranging it all.
 Carol played with a lot of different blues for the sky and created her own wind blown garden.
 Another feature of this workshop was learning my tricks to couch yarn as an edge finish as well as a surface decoration. The instruction sheet was taken from the tutorial I posted here.
Here's Patty happily sharing her creation at the end of the day.
 I'm grateful to Patty for taking and sharing these photos PLUS those in this album I've posted on Picasa. Go there to see the progression of many pieces created dynamically by those twenty quilters as well as classroom scenes thoughout the day.
PS: To read good thoughts and reasons for using Bottom Line thread for machine quilting go to Kathy Yorks blog and scroll down to her post for November 22, 2009.

 This opening is above my kitchen sink. It's as good as having a window since it lets in natural light from ,as well as the view of our courtyard entry. There is always a bouquet of whatever is in season on this shelf. After the first of the year it may be nosegay bouquets of pansies or even a few floating in that art glass piece. The plum fairy mixing a bowl of something sugary is in permanent residence ... usually sitting on that blue cow. Last year she shared this space with geriatric Elvis and friends.


 Fabric Bird Sculpture Pattern