Nellie"s Needles

Sunday, February 23, 2014

Soupcon #1 - Border

This afternoon the border that's part of step #4 for my first Soupcon Quilt Along project got sewn on ...
The narrow outer borders are cut from a fine Italian cotton with a tiny print that reminded me of the patterning used for men's ties. So that sent me searching for for the tin full of hexagons constructed from my husband's neckties that I made nearly twenty years ago after he had retired ...


Here they are pinned in place. The actual colors of the silk tie hexagons are a bit more subdued than they appear here.
...and a close-up so you can see the patterning of the Italian cotton.

I really like those silk tie hexagons, but I think they're too large. The edges each measure 1 1/4". I think my evenings work will be remaking them so they're 1"... the size of the hexagons that make up shapes in the focal area. Can't wait to get that done!

Post Script: A comment made on the Flickr site by one of my fellow participants has given me pause. She observed how the "viewer can look through." Now I see that center panel floating over a dark smoky background. Do I want to go with that or carry on with filling that negative space with the hexagons made from the silk ties. I've spent the evening making all of them smaller. I like the look, but just maybe they'll work better into the next step Karen gives us at the end of this next week. So this is it for this project until then.

Update May 8, 2019
Since I had set up a Face Book account whatever I'm working on, plus the goings on in my life have been posted there. Looking back through some of these posts I realize that I need to add some updates to projects that have long been finished ... this one with the hexagons for example. I did end up using the hexagons that I had reduced to one inch. Also this piece is hand quilted  with a diamond pattern.


Antique hand-made fabric buttons are centered in the hexagons within the border. This common element helped to linked them together into a unit rather than individual "spot dots." Visually they receded just enough so the snowflakes are the main focus.


The rest of those hexagons created from my husbands neckties ended up on our three same aged  grandson's "BIG Boy" quilts. I can hardly believe they're all twenty years old .. soon to be 21!


The quilt patterns are all a variation of "bargello" made with shirting and light-weight suiting fabrics.
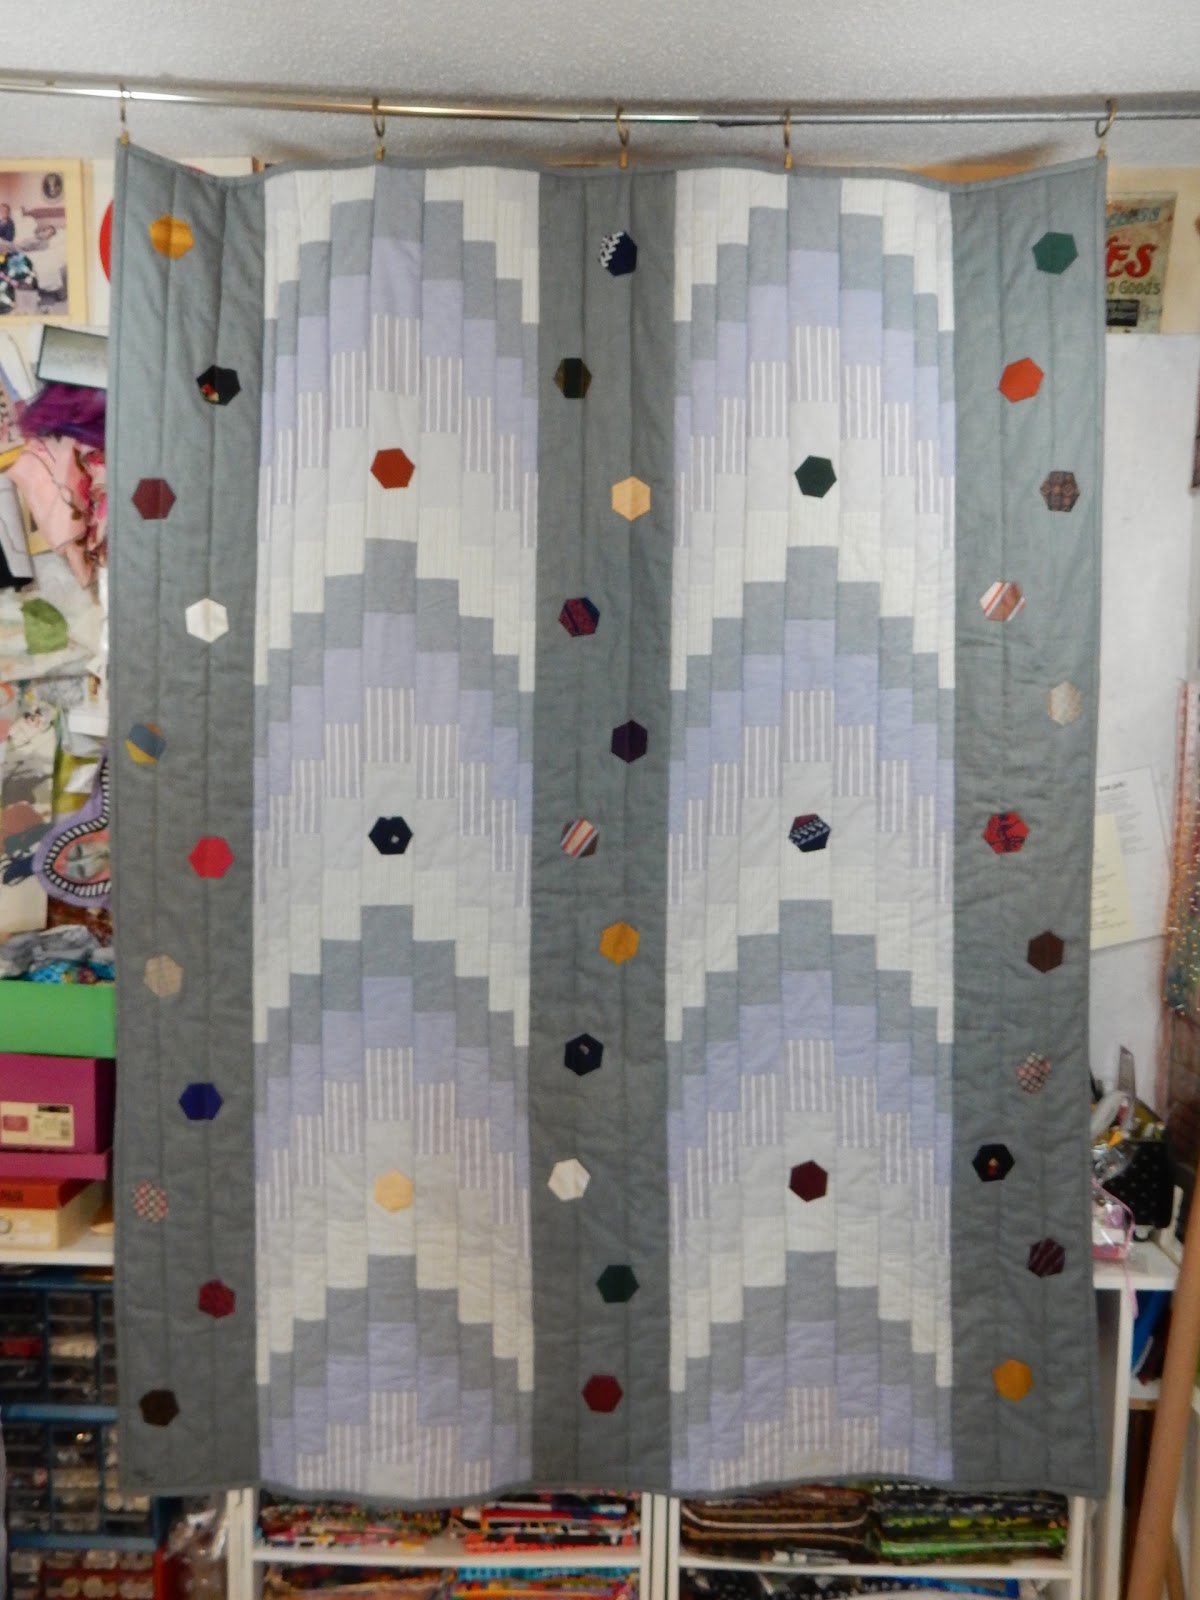

One grandson request the hexagons be on the "back" of his quilt. He liked the clean lines unadorned on the "front."

I do believe their next quilts will be hand-quilted wedding presents. One of which grew out of that "soupcon" project:


Wednesday, February 19, 2014

My 3rd Soupcon Quilt Along

I could not resist beginning yet another quilt using Karen of Faeries and Fibers instructions for this group quilt along.
It started with this hexagon I had made back in the first week of this group project.

 Soupcon Step 1

I got carried away with the "what if" possibilities and had made a bunch. I had ended up using this one to make valentines. It was printed out on textured paper and then I glued and couched threads to make designs. While doing all that I came across a square of silk I had hand painted quite a few years ago. The color reminded me of roses. So I went digging through the home dec fabric samples and found this piece ...

I scanned it in my printer, cut out one rose and a bunch of leaves and placed them on the hexagon. I liked what I saw a lot.
Soupcon Step 2
Paper cut-outs on left. Machine appliqued and quilted on right.

I had applied bonding to the fabric rose and leaves before cutting them out. The rose and leaves were adhered with a hot iron. The leaves were positioned under the edge of the hexagon and bonded down before it was hand-stitched in place on the background.

I wanted these elements to stand out a bit more on my finished piece so had placed a layer of wool batting on the under side before machine quilting around the rose and leaves. The excess batting was trimmed away.

Now it was time to add the rose-colored ring and background fabric...
Soupcon Step 3

There are a number of ways to make the ring. This is how I did it for this project (I skip this step if the fabric can be spray starched stiff enough to hold its shape).
Many years ago I had purchased this ruler that has holes punched at half inch intervals. By anchoring it into my small ironing pad that is a piece of covered fiber board I can draw my circle. These are the lines that are machine stitched...

The next step is to cut away the excess fabric beyond a seam allowance. Tear away the freezer paper from the inside seam allowance and clip the fabric at close intervals. Note that my scissor points don't go beyond my stitched line.
I use craft glue to adhere the folded seam allowance to the the freezer paper. Note that I fold and glue short sections that are opposite each other on the circle at a time. Repeat those steps for the outside seam allowance. Pin the circle in the desired position and either hand or machine blind stitch in place.

I hand appliqued mine, then machine couched rayon embroidery thread over the edges. (Go here for a tutorial on how I machine couch and scroll down to "couch yarns to the surface"). I used the same stranded rayon floss to embroider around the leaves and the rose.
Also, I wrapped the quilting stitches of the rose petals with this thread.

To my mind this piece begged for "dancing squares" in the next border.
 Soupcon Step 4
I learned this technique in a class taken from Ricky Timms. It goes together something like this...
It's been a while since I had made this type of border and had difficulty getting my spacing figured out. I will be hand appliqueing the two squares pined at the top of the side panels to fill in my too wide spacing.

Go here to see all the creative variations made by the Soupcon group members. If you're intrigued and wish to join the fun of making one of your own, go to Karen's blog to get instructions.

Saturday, February 15, 2014

Soupcon Quilt Along - Step 4

Yesterday Karen gave us instructions for the fourth step for our hexagon quilt along. I consider this to have been a very nice valentine from her. I spent the afternoon cutting and sewing the pieced border. I had no experience with this pattern and was glad to learn how to set those squares on point without going crazy.
19"x 19"
It wasn't until all the borders were sewn on did that pieced border begin to glow. To me it has the shine of faceted jewels.

In this close-up shot you can more clearly see the fabrics. Who would've thought that hand-marbled fabric would be the one that works. Wish I had taken photos of my other considerations, but I was too excited to get started to take the time to do so.

Now I'm excited to add this border pattern to my initial project for this quilt along ... the one that grew beyond the boundary of  Soupcon's first step. I did take the time to photograph the border fabric auditions on this one. I'm still in the process of embroidering around the hexagon motifs and will finish doing that before adding the border pattern.

Audition #1
The red patterned squares pick up the red in the hexagon's centers, though that scale is too large. I liked the colors in the pattern of the fabric around them, but it's really too busy.
 Audition #2
The dark fabric behind those same red squares is flecked with bright colors. It's the one in the background of my single hexagon piece at the beginning of this post.

Audition #3
I'm still liking that red fabric for the squares. This time over the same shaded black fabric that's behind the center star hexagon.

Audition #4
I happened to take notice of how the marbled fabric used for those diamonds in the other piece picked up the purplish hue of the big squares in this one. I do believe this with the shaded black background will be my choice. I think the striped fabric may be the one I use to outline the diamond pattern. Although, there's time for something else to take my fancy before I actually begin cutting.

Take note that the fancy border around the center star motif is appliqued and embroidered. I'm pleased. It's a bit of struggle coming up with designs to border the "round" hexagon shapes. I've just this moment begun to suspect they don't need embellishing. In which case, the embroidery I've done around the top center will need to come out.

Thursday, February 13, 2014

Happy Valentine's Day

Here's hoping you're "in the pink" ... that you find time in your day to imagine or create something out of this world.


This piece was made just for the fun of it quite a few years ago. I liked the challenge of working with all that pink. It's constructed in my "ortwork" technique and I think the size of it is about 12 inches square. It was donated to the Smoky Mountain Quilt Guild small quilt sale back then.

Wednesday, February 05, 2014

Third Step for SoupCon Quilt Along

Last Friday Karen of Faeries and Fibers gave those of us who are participating in her SoupCon quilt along project a third step for our hexagon block. I was thrilled that it involved appliqueing a ring around our focal point hexagon shape, because that is what my piece had already dictated to me. I've gotten the bits and pieces appliqued into the pattern I want. My next step is to add embroidery ... most likely a lot of buttonhole stitches to echo the printed spiky pattern around each shape.

This is what Karen posted with instructions for how to get our pieces to this point.
I have no idea if what I've done to my piece will accommodate Karen's next three sets of instruction. Sooooo ... using one of the seven more hexagons that I made in step one of this project, I've started another quilt.
I had printed images of each block so I could play with ways to extend the fabric pattern beyond the block into the background. I used crayons because the colors stood out on the printed paper.
The next step was to applique the hexagon to a background fabric. I liked this black speckled with colors. Then the fun of doing the embroidery began ...
The leaves on the points are really more green than the gold in this photo.

Then I was ready to frame it with an appliqued ring and another background fabric.
I can hardly wait for the next step of instructions a week from this next Friday. In the meantime, I'll be doing a lot of embroidery on the frame around my hexagon star center piece ... as well as making valentines.

PS: It's not too late to join in on this fun project. Go to Karen's blog for instruction. The first installment is posted here.