 "Gingko Leaves #3" - 5"x6"- 2006
As for the couched yarn edging, I use an open-toe foot. Set a wide zig-zag stitch width (6 to 6.5 on my Pfaff). Lay the yarn about an 1/8" away from the quilt edge and let the zig-zag stitch pull it into place. This lessens the chance of the yarn being pulled over or under the quilt edge. Set stitch length to 2 (Pfaff). I begin sewing near the center of one side.
 To keep "square" corners, sew one stitch beyond (off) the edge of the quilt. Reverse stitch back onto the quilt.

With the needle down, pivot the quilt and again reverse sew one stitch off the edge of the quilt.
 To keep "square" corners, sew one stitch beyond (off) the edge of the quilt. Reverse stitch back onto the quilt.
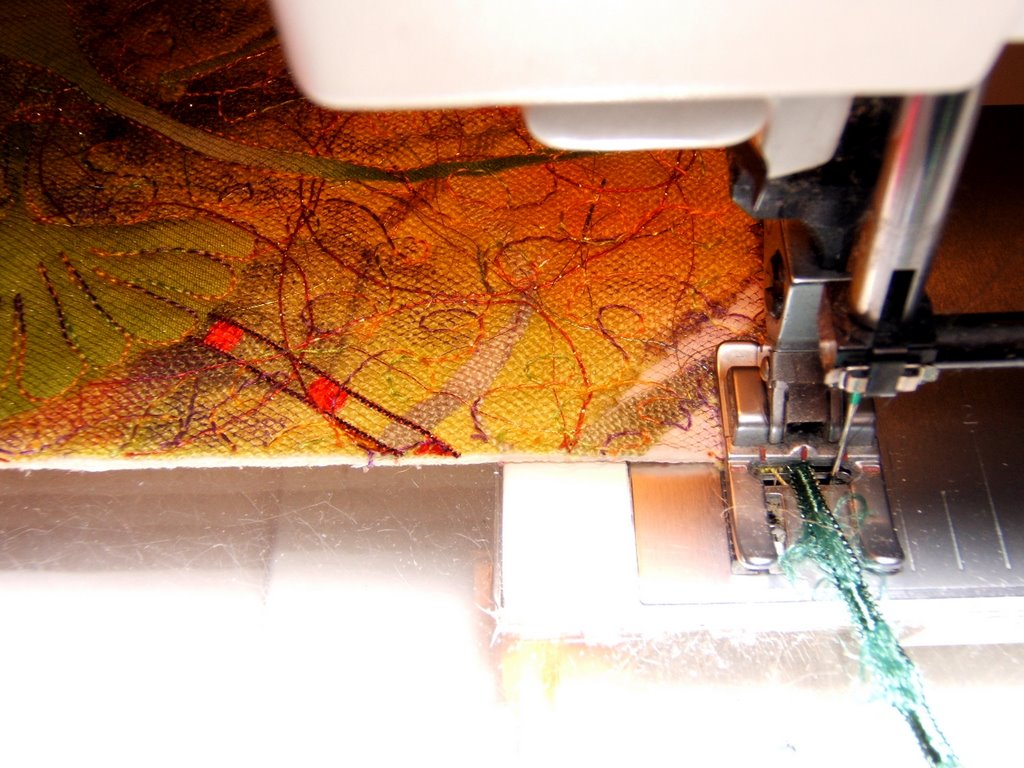
With the needle down, pivot the quilt and again reverse sew one stitch off the edge of the quilt.
 This sewing off the corner edges securely stitches the yarn at the corner so it won't curl or be rounded by the yarn pulling over or under that corner.
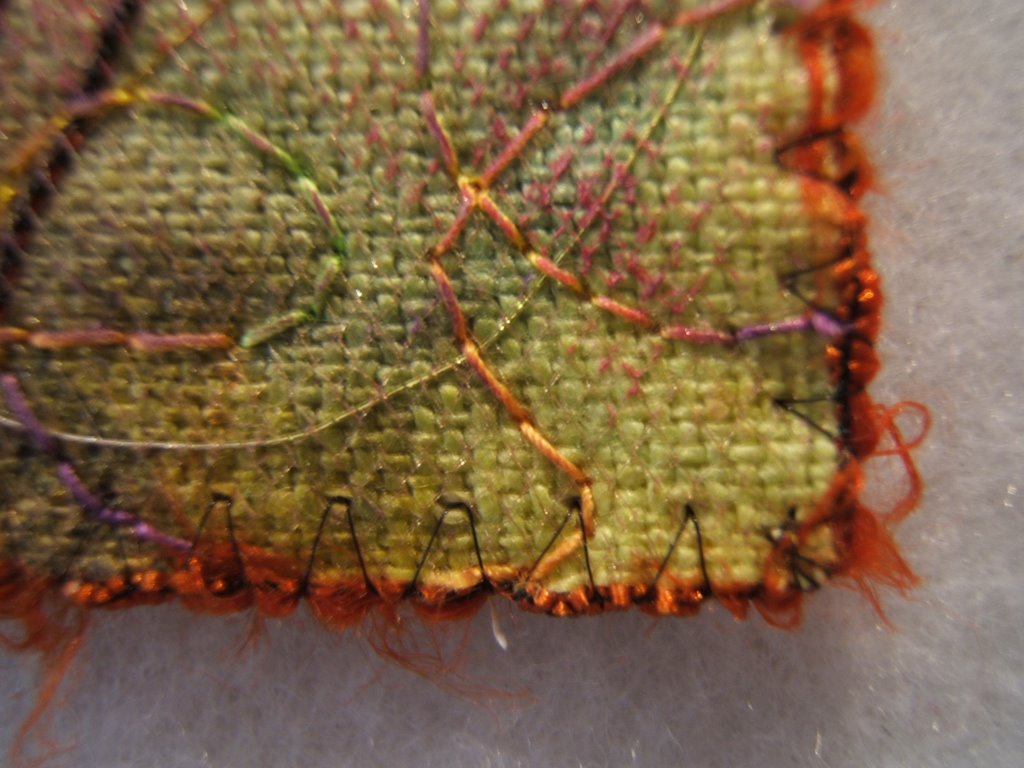
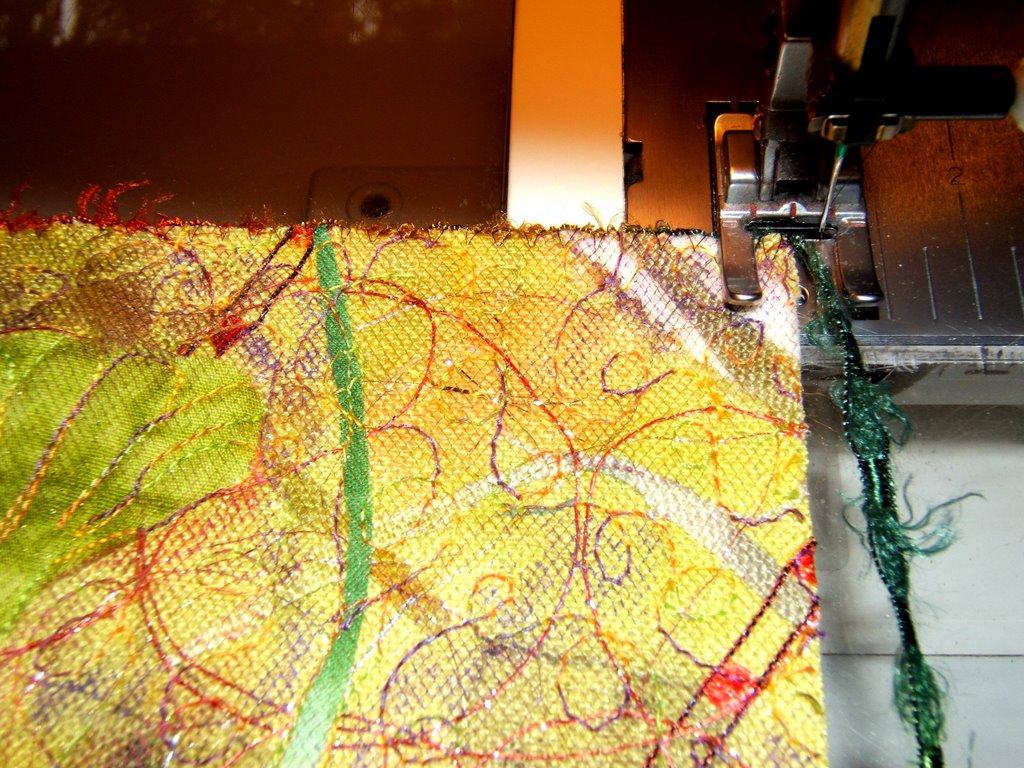
Usually I couch another row of the same, or a contrasting yarn, over the inside edge to cover up the zig-zag stitches that are visible (even though I use invisible thread). Here I've used a variegated novelty yarn that has a twist like a cord.
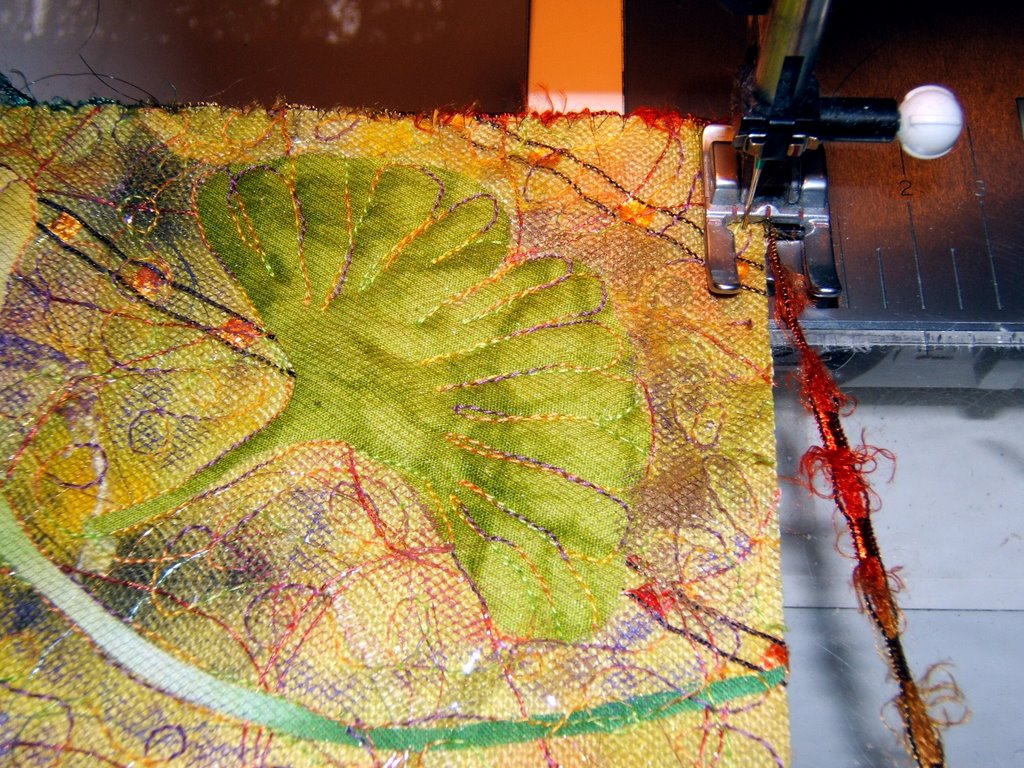
 To couch yarns to the surface I use a foot meant for straight stitching ... one with a small round hole. I've found that I can safely zig-zag a .5 or 1 width setting on my Pfaff within that hole. The advantage to using this foot is that the yarn is fed through that hole for the needle. I hold the yarn high so I can see under it. This allows me to see exactly where I'm going. I don't even think about the stitches catching the yarn because it is being fed so close to the needle it "cannot miss". The length of the zig-zag stitch depends on the yarn/trim. The closer the stitch, the more confined the yarn/trim is with heavy stitching.
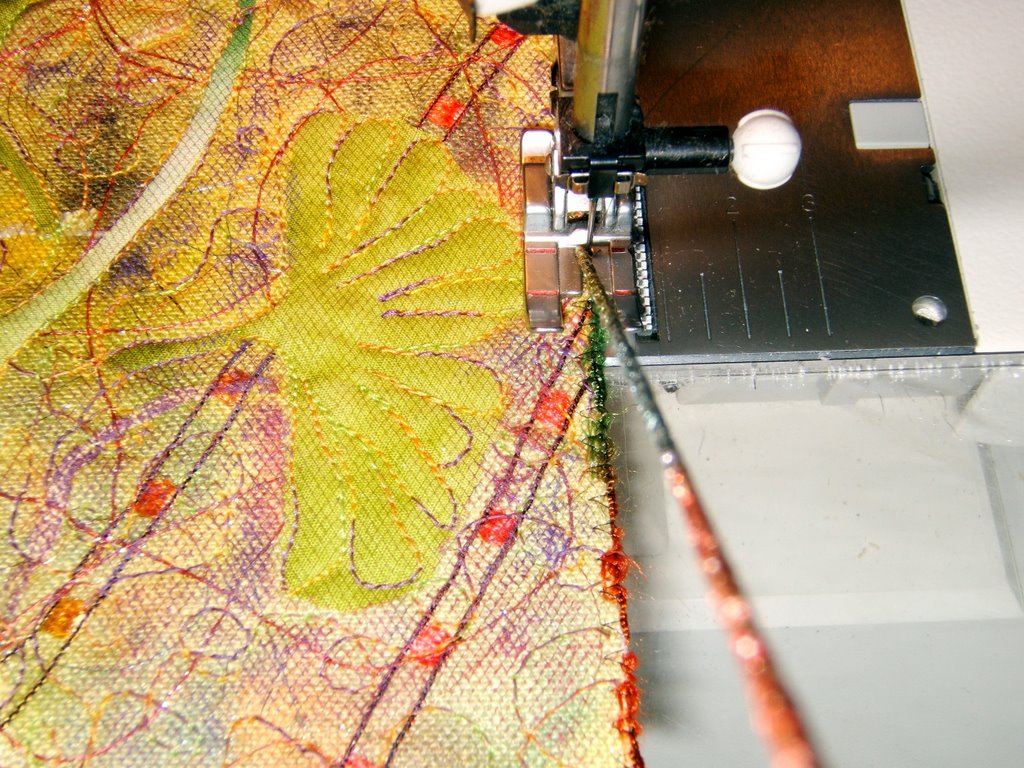 This method works great to couch yarns in any pattern you desire to a quilts surface. It's easy to couch yarns in graceful lines or around a shape. I've even couched fairly intricate patterns over drawings on tissue paper. The one caution is to give the yarn slack, do not hold it taut. That is, unless you need an edge that has flaired in the process of finishing the binding to be shortened. An ordinarily "too tight" couched trim can be a solution.
Here are all eight of the Gingko series. I used a hand-painted linen for the backgrounds. The yellow leaves are cotton batiste that I also hand painted. The green leaf is a commercial fabric that looks hand-painted. They are constructed in my "ortwork" technique. Each one is different. I was playing!
 These have been presented to friends as gifts.
Note: All photos are clickable for a larger picutre in a new window. To get back to the posting, click the "back arrow" icon on the server.
The blue colored words are clickable to get to links that have more complete information .
All photos are clickable for you to view a larger version in a separate window. Click the back arrow icon of your server to get back to this post. The highlighted text is also clickable to take you to the link or posting that is being referenced.
They just get better and better!
ReplyDeleteI just love Gingko leaves. Wonderful idea for postcards. Couching is such a good way to add interesting texture to a work. These are really nicely done.
ReplyDeleteTerrific tutorial for edging postcards. And I learn a new word..ort! Now my coffee jar of threads has a proper name, which as a Briton I orta have known (sorry) :}
ReplyDeleteThanks for the tips on couching on the edges- I like the effect it give. And the gingko leaves are lovely!
ReplyDeleteThis is a great post, very informative for me. I have tried couching on edges without very satisfactory results. And I would never in a million years thought that you could do a zigzag through that straight stitch foot. Thanks.
ReplyDeleteThe post cards are beautiful too.
I forgot to tell you that i have been using your technique for a lot of edges and it's wonderful!
ReplyDeleteLove the ginkos and that you "play".
ReplyDeleteThank you for such a detailed tutorial. Can’t wait to try this method of using yarn as a binding, more delicate than the way I've done it previously.
ReplyDelete