Nellie"s Needles

Monday, January 28, 2008

Seams For Pre-quilted Blocks

Seams and details within this quilt have kept me busy. To more easily handle this quilt I had decided to seam the elements/blocks together that I know/believe work.

I use scotch tape to secure the butted edges of two blocks in position. These are placed about 6" apart on the back side.
A wide zig-zag (7.0 on Pfaff 7530) stitches them together. I use a mono filament thread for the top so the seam won't be visually obvious. A regular thread is on the bobbin.
Gently pull one side of the tape backwards across the seam to allow the stitches to tear through the tape to more easily remove it. Do the same with the other end.
I like to strengthen this seam between blocks. My additions not only do that, they also camouflage it or soften and blend hard edges between the blocks. This is done more easily while the pieces are small and manageable. Note the free-motion back and forth line that had been added to the diagonal seam across the two outside blocks when I initially sewed them together.
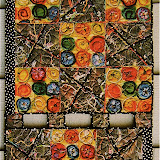
On the two seams between the three large focus blocks in the center of the quilt I layered pulled apart yarn and spirals cut from the black linen reverse-applique process.
Those bits and pieces are held in position with gold tulle. I then free-motion stitched around the spirals and back and forth lines through all layers. The excess tulle was then trimmed away.
THEN it occurred to me that reinforcing the back side of the seams should be done at this time as well. Reducing or eliminating the stress on the seams of large quilts constructed this way is a good idea.
I cut strips of fabric on the straight of the grain. These are 1 3/4" wide, folded in half and stitched with a 1/4" wide seam.
I don't know what these flat heat resistant plastic bars are called. They come in a set. Their purpose is to make tubes of fabric without having to turn anything inside out. Insert the bar, twist the tube so the seam is laying in the center. Steam press the fabric flat. Then advance the bar to the next section of the fabric tube.
I blind stitch the tubes over the seams. This is not the fun part, but it's necessary for fine craftsmanship in construction.

It THEN occurred to me that adding details such as the metal spirals will be easier to do before the pieces get any bigger. Sooo... that's what I'm doing now. I'll get back to the subject of designing this quilt soon.

8 comments:

Donna said...

I'd never thought to use bias tube bars for straight cut fabric... great plan!

Joyce said...

I am learning so much from following your thoughts on this project.

jude said...

although i very little computer time these days, i am following your every step here, and learning and loving....

Kay said...

This is really nifty! It makes me want to pre-quilt some blocks and put them together! We had a program in my guild recently about putting together pre-quilted blocks with stitched bands; I thought this was way too anal, and of course produces tiny little sashing all over the top so the design options are very limited. Yours is a great blend of fun on the front and craftsmanship on the back.

Shirley Goodwin said...

Great attention to detail!

Maddie Can Fly said...

Thank you so much for the close ups of doing the seaming. I have a quilt I'm working on where I've been wanting to quilt first and then assemble. I was hesitant about how to do it, now I can see how. Thanks again!

Teodo said...

I've never done in this way....I've always created the top and then made the sandwich.
It's very interesting like this and it's a brend new technique for me.
ciao ciao

jenclair said...

I love the way you added the spirals after the zigzag stitching, especially since the design features the spirals already. Although, I could happily put spirals almost anywhere!