Nellie"s Needles

Thursday, November 09, 2006

"Out of Chaos"

I would like to share the story behind the making of one of my first quilts. It was begun when I really had no time to sew, nor was I unpacked from the seasonal move from Michigan to Tennessee. I was climbing over and digging through boxes to find fabrics. It was "stop the world, I've got to make this quilt!".
There was much chaos in my studio at the time. Although this starry universe of hand-dyed fabrics depicts orderliness, you can see hints of chaos in the batik printed blocks. Thus, the title "Out of Chaos" ... both figuratively and literally.

The strange thing is, is that it was several years between piecing the top and quilting it. Somehow, I find it difficult to finish a quilt until I know who will be getting it. This one was a wedding present for my nephew and his wife. She and I had become close friends during their courtship. I felt as though I was gaining another daughter-in-law when they married five and half years ago.

It is machine pieced and hand quilted. I did a lot of the quilting while on vacation in Colorado. As you can see, I like to piece the backs of my quilts.
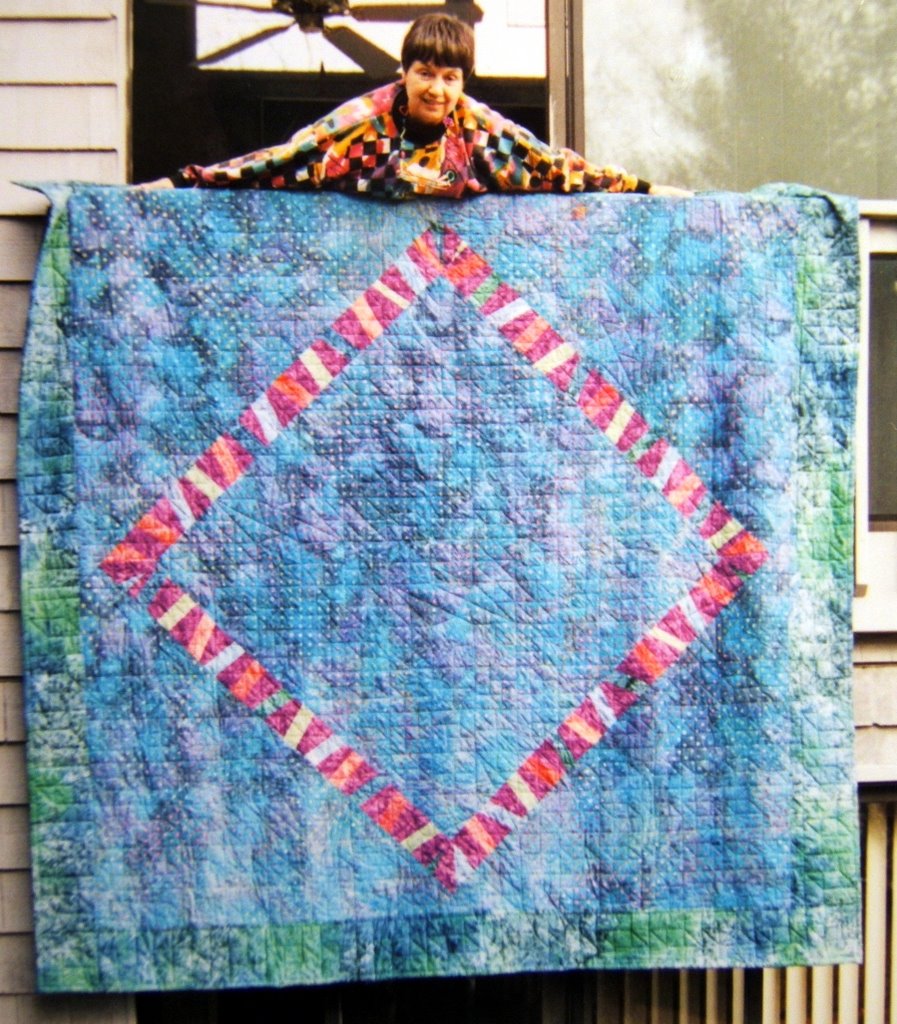
Following is what I wrote in the letter that accompanied this gift:

This quilt, like your relationship, has been in the works for several years. Building a lasting relationship parallels the process of creating a quilt. Both require a lot of time, commitment, work, and love.

First, there's finding a fabric that you just love without really knowing why ... you've just got to have it. Then there's discovering how it can work into a pattern that you want to commit time and energy into developing. Then comes the excitement of building patterns, selecting compatible fabrics, and realizing a theme or meaning that emerges in the process. And then, there's the passion of arranging and rearranging the colors and design elements to get it all just right. Then the real work begins ... sewing all those small separate pieces together to make a whole cloth. But it is not yet a quilt.

Decisions must be made about the other layers that will make all of this yardage into a quilt. What batting to use? What fabric and design for the backing? Now, it must all be layered and basted together in preparation for the long process of quilting by hand. Each stitch binds the layers together as well as gives a richness of texture to make a functional quilt that will give warmth and add beauty to the world. Finally, a well worn quilt with a legacy of comfort and love will be passed on to the next generation.

It is signed, "made with much love".

All photos are clickable for you to view a larger version in a separate window. Click the back arrow icon of your server to get back to this post. The highlighted text is also clickable to take you to the link or posting that is being referenced.

Monday, November 06, 2006

Spectrum of Love

I'd like to share about the making of this piece. The reason for its creation is explained in a previous posting, "Out of the Rubble" near the end.
"Spectrum of Love" - 60"x60" - 2002
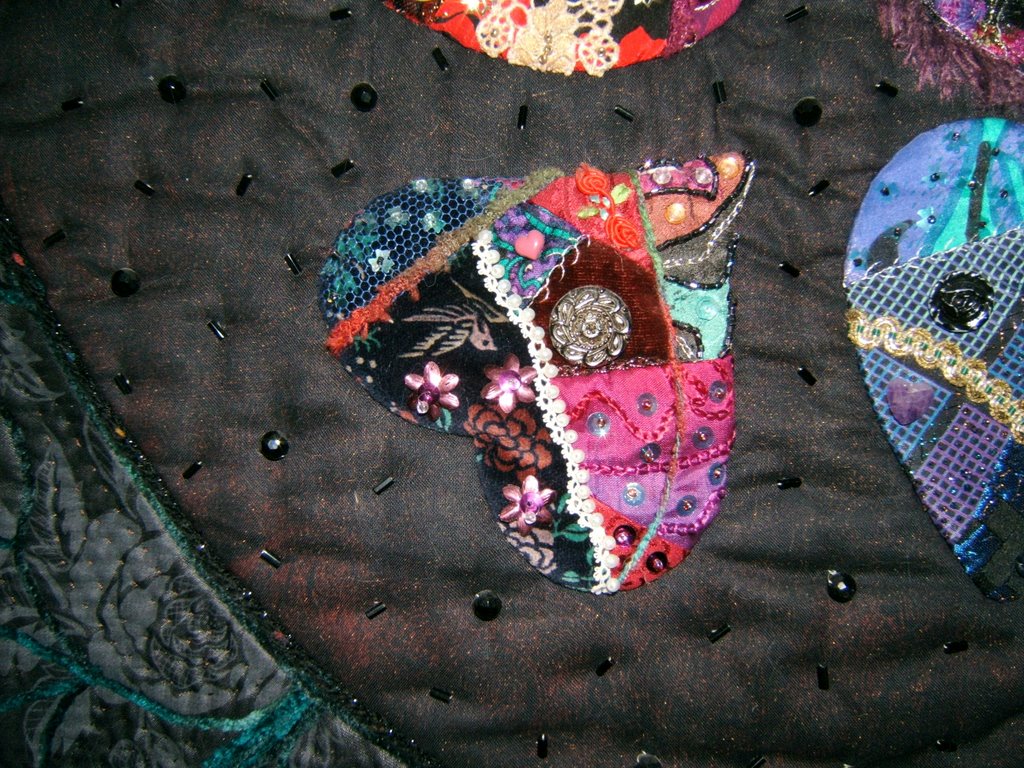
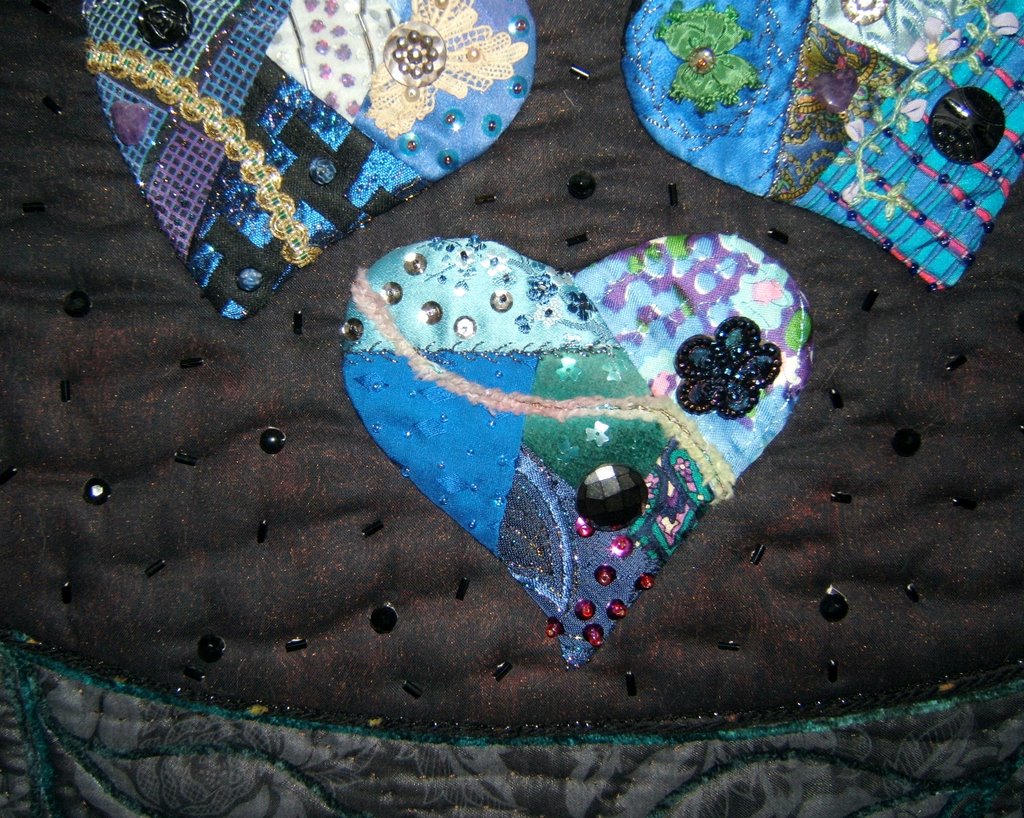
The crazy patchwork hearts and "ort pizza" were made in the year 2000. Making the hearts was a project that my friend, Alicia, and I had fun with when she visited me here in Tennessee that year. We each made about a dozen as valentines at that time. After she left, I continued to make more. I had set a challenge to limit the colors within each heart to one hue. After completing quite a few, I began to play with them on the design board and determined that a circle would be good. Then I made the transition hearts between the single hued ones using analagous colors.
The circle in the center is comprised of the trimmings from the silk and velvet fabric samples, lace, and ribbons used to make the hearts. This was an early ortwork piece. I did not intend to use it with the hearts when it was made. I was just playing. Arranging those scraps in a color wheel spectrum seemed the thing to do. Amazingly, the size and proportion as well as the color arrangement fit right into the center of my hearts.

There are beads tied through all the layers to quilt the area around the hearts. Random lines of machine stitching quilts the center circle.
I used the flip and sew method to construct the hearts. There is a center fabric shape cut with five sides. Additional pieces of fabric added one at a time were machine stitched to it, thus building a larger piece of fabric.
Each heart was completed before it was hand appliqued to the quilt. The pieced fabric was layered with a batiste backing and a thin layer of batting. A heart shape was drawn and machine stitched. Then the backing was slit and the shape turned right side out. The sewing of beads, sequins, and buttons plus embroidery quilts each heart.In the posting about couching yarns, I mentioned making patterns with couched yarn. That is how the vine pattern lacing around the circle of hearts is made.
I drew and cut out a paper pattern to fill the corners. It was traced around with chalk. I then just followed my drawn lines to couch the green chenille yarn. The batting and backing fabric were in place so this machine couching was also quilting that area. I had gone back and hand quilted between the leaves and stems with carpet thread.
The flowers among the vines were white commercial ones that I painted. They are held in place with knotted centers that go through the quilt.

This is the first quilt in which I used wool roving. I discovered the roving in New Zealand. It's trapped under a layer of tulle in the red border and gives the effect of light shining outward from the center of the quilt. Of course, the couched yarns in a ray pattern also contribute to that effect. This couching is also the quilting for these borders.

The border with the half-square triangle blocks of various black silk fabrics is made in Ricky Tims "dancing squares" technique that was presented in his "Caveman Quilting" workshop. I attached hand-painted Japanese satsuma buttons in their centers. My mother-in-law had these in her shop. When they were no longer being made she didn't know how to price them, so she gave them to me. I'm happy to have found a perfect place for these rare buttons.

Exhibition:
2002 - - Dogwood Arts Quilt Show - Knoxville, Tenn.
received Surface Emblellishment award and
an Honorable Mention

All photos are clickable for you to view a larger version in a separate window. Click the back arrow icon of your server to get back to this post. The highlighted text is also clickable to take you to the link or posting that is being referenced.

Friday, November 03, 2006

Couching Yarn

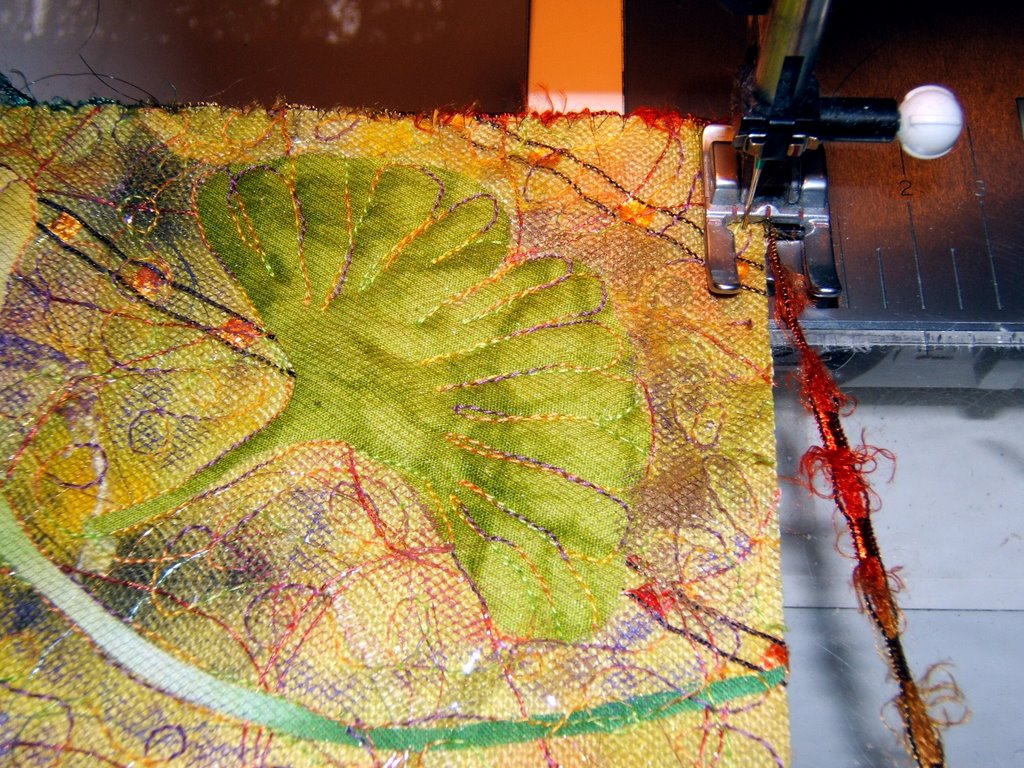
Many of my pieces are finished or embellished with yarn couched to the edge or surface. I'd like to share the tricks that I've developed to work with yarns or trims by showing the steps in the making of "Gingko Leaves".

"Gingko Leaves #3" - 5"x6"- 2006
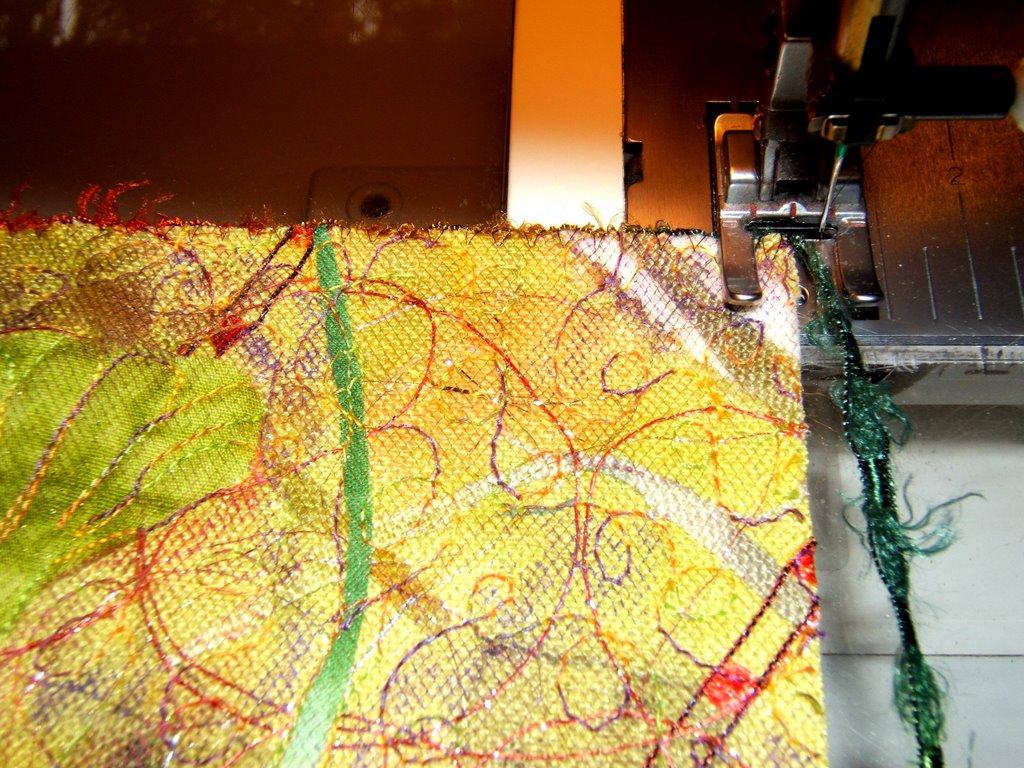
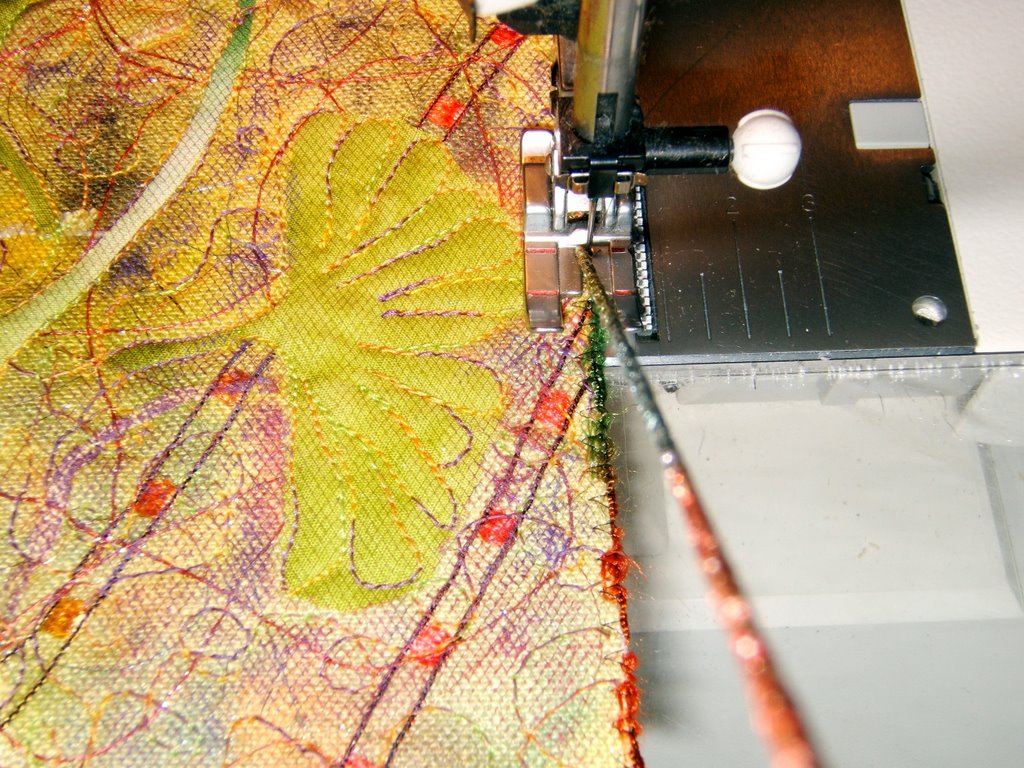
As for the couched yarn edging, I use an open-toe foot. Set a wide zig-zag stitch width (6 to 6.5 on my Pfaff). Lay the yarn about an 1/8" away from the quilt edge and let the zig-zag stitch pull it into place. This lessens the chance of the yarn being pulled over or under the quilt edge. Set stitch length to 2 (Pfaff). I begin sewing near the center of one side.
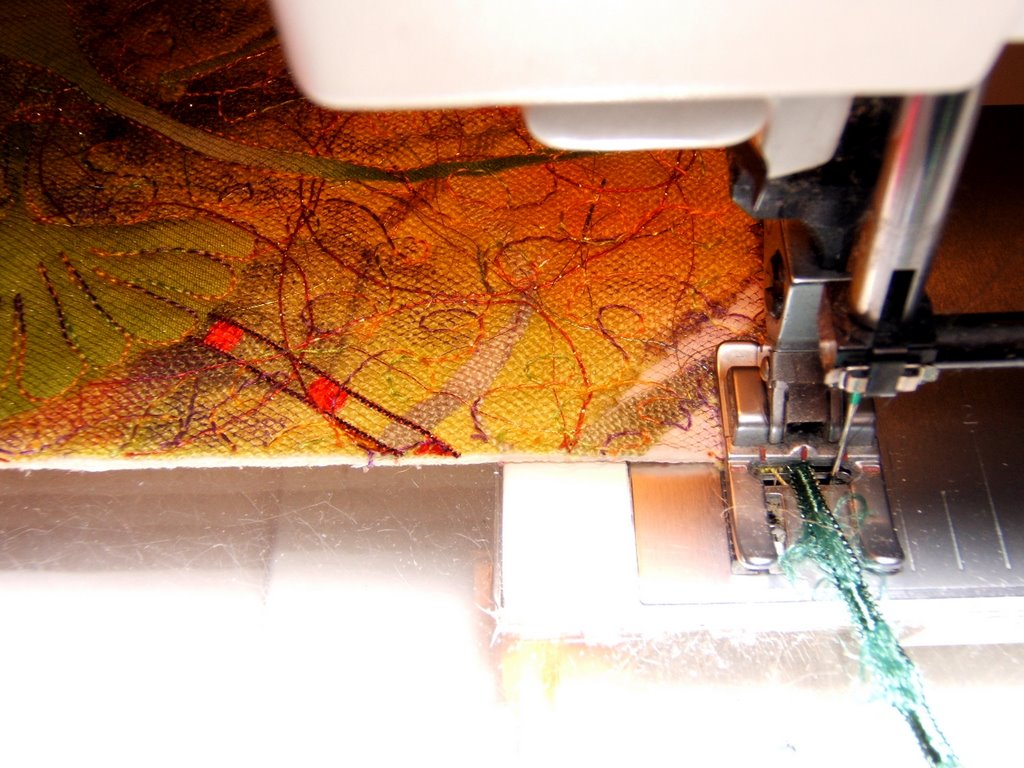
To keep "square" corners, sew one stitch beyond (off) the edge of the quilt. Reverse stitch back onto the quilt.

With the needle down, pivot the quilt and again reverse sew one stitch off the edge of the quilt.
This sewing off the corner edges securely stitches the yarn at the corner so it won't curl or be rounded by the yarn pulling over or under that corner.
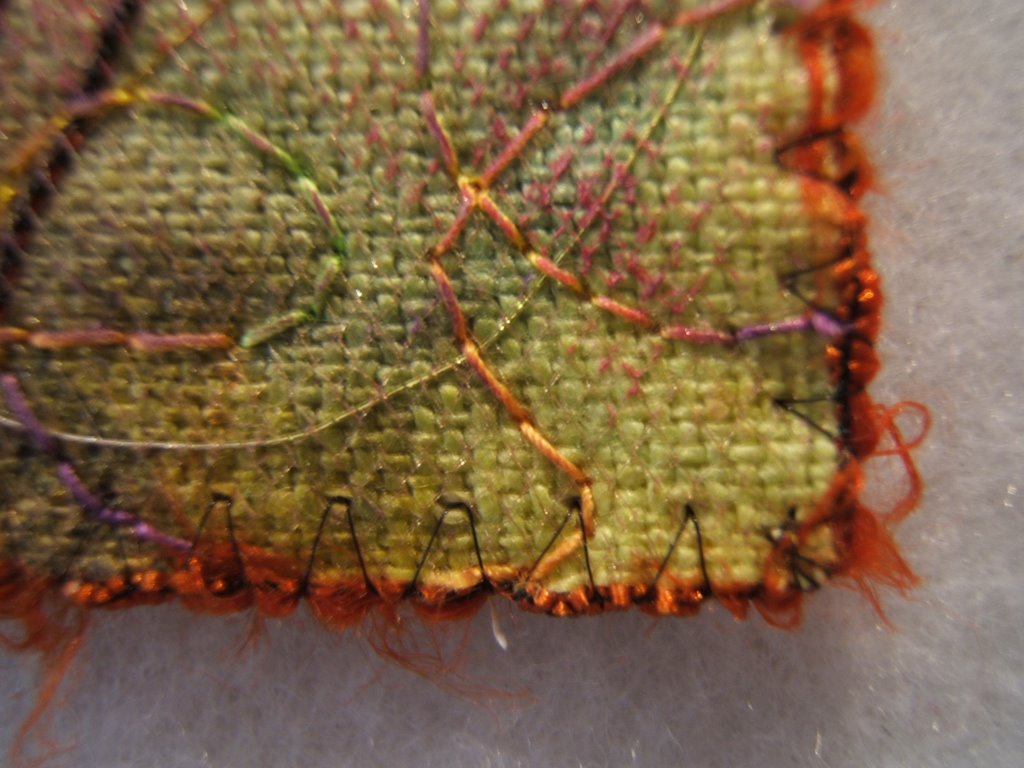
Usually I couch another row of the same, or a contrasting yarn, over the inside edge to cover up the zig-zag stitches that are visible (even though I use invisible thread). Here I've used a variegated novelty yarn that has a twist like a cord.
To couch yarns to the surface I use a foot meant for straight stitching ... one with a small round hole. I've found that I can safely zig-zag a .5 or 1 width setting on my Pfaff within that hole. The advantage to using this foot is that the yarn is fed through that hole for the needle. I hold the yarn high so I can see under it. This allows me to see exactly where I'm going. I don't even think about the stitches catching the yarn because it is being fed so close to the needle it "cannot miss". The length of the zig-zag stitch depends on the yarn/trim. The closer the stitch, the more confined the yarn/trim is with heavy stitching.
This method works great to couch yarns in any pattern you desire to a quilts surface. It's easy to couch yarns in graceful lines or around a shape. I've even couched fairly intricate patterns over drawings on tissue paper. The one caution is to give the yarn slack, do not hold it taut. That is, unless you need an edge that has flaired in the process of finishing the binding to be shortened. An ordinarily "too tight" couched trim can be a solution.

Here are all eight of the Gingko series. I used a hand-painted linen for the backgrounds. The yellow leaves are cotton batiste that I also hand painted. The green leaf is a commercial fabric that looks hand-painted. They are constructed in my "ortwork" technique. Each one is different. I was playing!
These have been presented to friends as gifts.

Note: All photos are clickable for a larger picutre in a new window. To get back to the posting, click the "back arrow" icon on the server.
The blue colored words are clickable to get to links that have more complete information .

All photos are clickable for you to view a larger version in a separate window. Click the back arrow icon of your server to get back to this post. The highlighted text is also clickable to take you to the link or posting that is being referenced.
Thursday, November 02, 2006

Postcards From Michigan

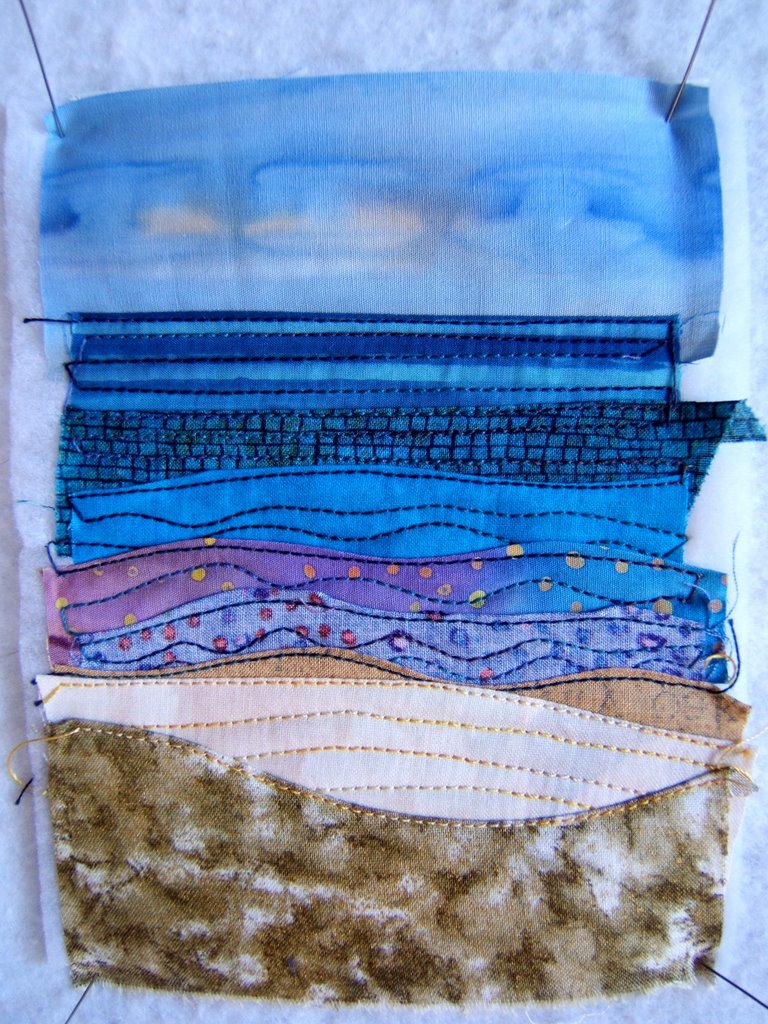
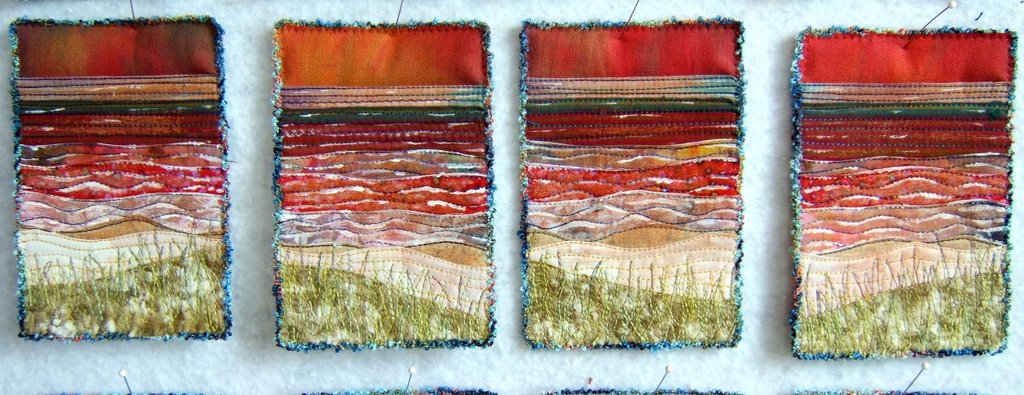
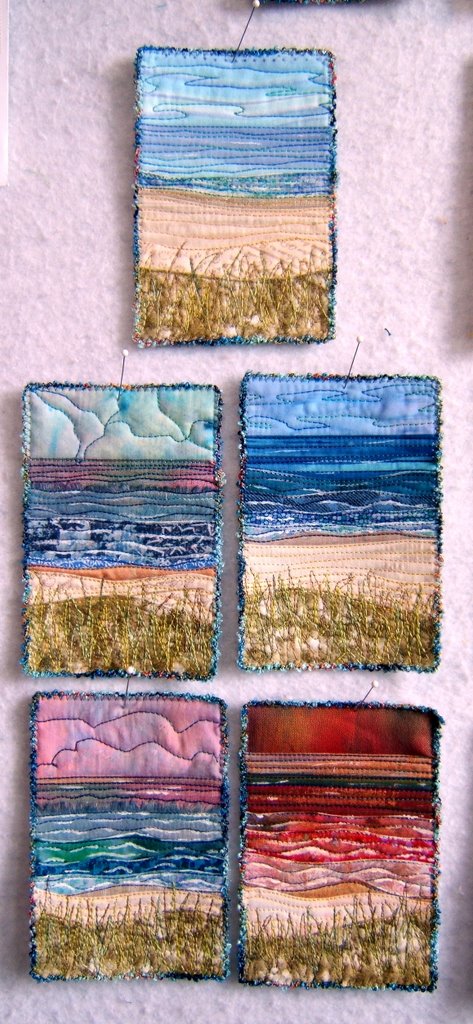
Initially, I wasn't going to partake in this project of exchanging postcards within my Thursday Bee group in Tennessee. I didn't want to "jump on the bandwagon" of the so many quilters making postcards. However, I had a ball making six series of 4 featuring differing kinds of days, or time of day for the lake that I live with in Michigan.
The beach scene at the top was my inspiration to feature Lake Michigan as my subject.
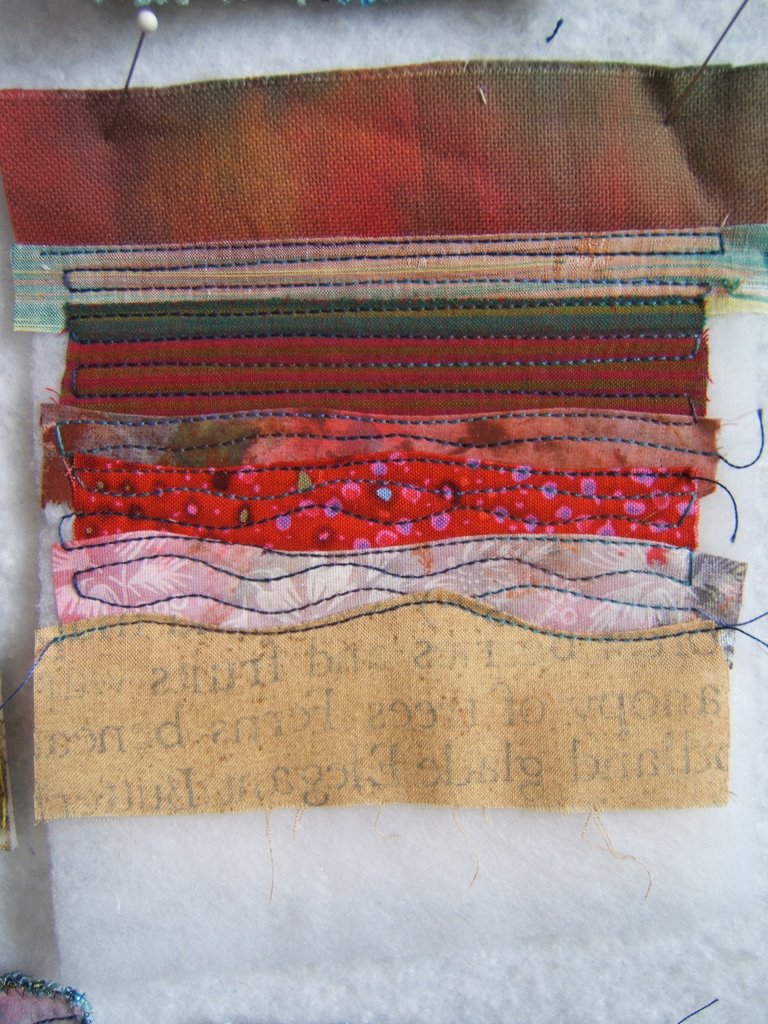
I used the layered curves technique that I have previously described in this post.
I created four in each series for two reasons. First, because I needed so many (only 10 for the exchange, but then there were friends I wanted to share these with). Second, I set a personal challenge to see how I could vary each one within the limitations of using the same fabrics for each series. Plus, I kept getting inspired by the lake or by discovering a fabric in my stash that I hadn't even considered previously.
Here I was working on a stormy sunset. Or maybe it's the reflected sunrise effect that we woke up to one morning while a storm was over us, but not way out on the lake.
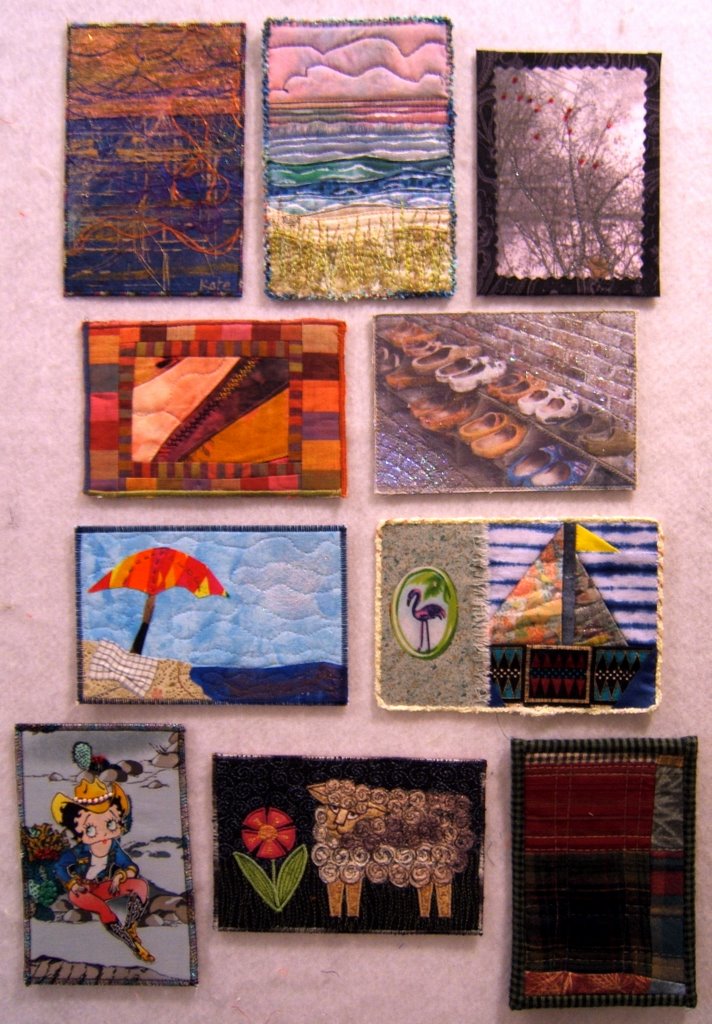
TADA! Here's my collection of postcards from the exchange that took place today.
My plan is to make a mobile of these little gems to hang in my studio. I like having the creative energy of my friends in my space.

All photos are clickable for you to view a larger version in a separate window. Click the back arrow icon of your server to get back to this post. The highlighted text is also clickable to take you to the link or posting that is being referenced.
Wednesday, November 01, 2006

Art Share Meme

I'm participating in this fun way to share art among bloggers. I was the fifth commentor on Albedo Design's weblog and will be receiving an art piece from "arlee".
I don't know where this idea originated but if you'd like to partake, be one of the first five people to respond to this in my comments section and you will receive a piece of my artwork. It will be one of the postcards I made of my beloved Lake Michigan.

If you are one of my friends who have already received one of these, please restrain from being among the first 5 to respond. Also, if you respond you have to post this to your blog too and continue sharing the art.

All photos are clickable for you to view a larger version in a separate window. Click the back arrow icon of your server to get back to this post. The highlighted text is also clickable to take you to the link or posting that is being referenced.