Nellie"s Needles

Thursday, May 22, 2014

Four More Violet Pieces

added to my wild flower series ...

All these had begun as a single whole piece. It was the size of the one donated to the charity auction that I wrote about in my last blog post. At the end of two full days work, I did NOT like it at all! I went to bed with the thought of closing up my studio for good ... thinking maybe I had "lost it" and should consider going back to making functional quilts. For me the designing process to make those is less complex and frustrating to get satisfactory results.

But the next day I had a different thought ... cut it up! It's the woods in the distance that I fell in love with at the beginning of this series. It's the part I liked best in the first one. Particularly at the beginning of building that piece.


 beginning of Violets #1


So ... it was cut in half. I allowed a bit of foreground space for patches of flowers. Pieces were cut from the right and left sides for the sake of the composition, I worked on the woods a bit more, added the violets to the foreground, and then bordered it with a frame made from the piece that had been cut from the center of the frame for Violets #1. Three green skeleton leaves were added for balance in the bottom section of the frame.   Here's the result ...
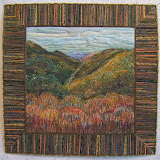
Wild Flower Series - Violets #2 (17"x 12.5")

The bottom section of that cut apart piece had a real birch bark piece. This was my main consideration for how to size the next picture in this series. The leaves had been sewn in place on the original so that was also given thought. I chose to use the perspective of "bending down close to see the violets" in this one.  It's bordered with what had been cut away from the center of the frame for Violets #2.
Wild Flower Series - Violets #3 (13"x 8")

Well ... now I had the quilted center that had been cut away from the frame of the above piece. This prompted me to stitch together the two sections cut from the sides of the woods in #2 to create this vignette to fit within it. Just a bit more work and it became my favorite in this whole violet series.
 Wild Flower Series - Violets #4 (5.5"x 8")

I was definitely back in the groove and happy to be in the studio by this time ... that being a few days later. The previous small piece made me fall in love with making art again. Composing this one from the last section of what had been "cut up" came easyMy perspective on this one is "I can almost smell those blossoms."
Wild Flower Series - Violets #5 (9"x 8")

These four pieces that were intended to be a single large one are destined to the gallery in Michigan, Good Goods, for their special 25th anniversary exhibition in mid-June. I've since made two more pieces for this occasion. I'll post about those next.

Sunday, May 04, 2014

Violets #1

A year ago my wild flower series was begun with five pieces featuring trillium. This spring I'm continuing it with violets. The first was completed today ...

"Wild Flower Series - Violets #1 (21"x 17")

Last years series featured a micro view of the flowers on a woodland floor. I began this new series with a long view of the woods in the distance ...
How the light filters through the stands of trees in the spring intrigues me. I love  the sprinkle of new leaves ... so many of which are yellow and orange and of course, bright yellow green. Here in Tennessee there are Dogwoods blooming in the understory of trees, so they're there, too.

A bright green tulle was quilted over that stand of trees and undergrowth in the upper half of the piece while a camouflage printed tulle hold all the bits and pieces of my composition on the bottom half. The log is a piece of actual Birch bark.
Leave shapes and violet petals were cut from disassembled silk flowers. I glued pieces together to form the blossoms. They and the leaves are just laid on the surface in this picture to test  the composition. I wanted to present the perspective of leaning down to admire ... and pluck ... a small cluster of these delightful blooms.

Here I've captured the leaves with quilting under green tulle. The excess netting was trimmed away close to the stitching. The leaves were then shaded with pastels and defined with paint.

I cannot tell you why I changed the arrangement of the flowers from how you see them in the previous photo ... extending their stems above the clump. I suspect it's how they're suspended from the curve at the top of their stems that swayed me. I'll revisit that first arrangement for the next piece in this series. It was at this point I started to think about the possibility of a border and where the edges of the composition could be.

From the beginning it was in the back of my mind to mount this piece on a stretched canvas frame.
That involves another layer of quilting to hold the finished art to a separate piece of fabric that wraps around and is stapled to the wood frame. I cover those staples and raw edges with Duck tape.

I made this piece specifically for the charity auction, "Art in the Garden" on June 16th to raise funds for Random Acts of Flowers here in Knoxville.
Random Acts of Flowers (RAF) is a non-profit 501(c)(3) charity improving mental health through the power of giving flowers. RAF volunteers collect donated flowers from weddings, memorial services, florists, special events, grocery stores and churches – to recycle and repurpose them into beautiful bouquets for delivery to patients in area hospitals, nursing homes and hospice care centers. As a recycling “green” charity run almost entirely by volunteers, Random Acts of Flowers is committed to nourishing the health of the environment, individuals, and the community.
What could be better than for me to create an art piece for them with recycled flowers and leaves plus bits of fabric from other people's quilted projects.


Go here to see blog posts about the trillium series.


Monday, March 24, 2014

"Smocking: Fabric Manipulation and Beyond" Exhibition

I'm recently back from a trip to California. One reason for it was to celebrate the opening of this exhibition at the Lacis Museum in Berkeley to which I had gifted most all of the smocked clothing and decorative items I had created.
 
There were two big receptions for this show. The first one on March 8th is described in Laci's newsletter as "a day LMLT will long remember.  With the coming of Sarah Douglas, Mimi Ahern and Nellie Durand, who hosted a delightful and lively interview with the many visitors, the future of smocking is secured, the techniques of fabric manipulation. an invitation to creativity, demonstrated by the works of these ladies some 35 years ago and by the works of today as submitted by the contributors to this exhibit."

The discussion session that included questions from the audience was my favorite part.


The exhibition is extensive. This is just a small portion ...
Go here to see a slide show of all the exhibited pieces. That is, all but the smocked dress worn by Anne Hathaway in Les Miserable. That garment is shown in a separate gallery and can be viewed with a museum person, because it is not allowed to be photographed. Otherwise, picture taking is welcome. I enjoyed meeting and talking to the many visitors at this reception as well as the Smocking Arts Guild of America events held during the next week.

I was thrilled for this opportunity to be with Sarah and Mimi after not seeing them since I "retired" from teaching and all SAGA activities well over twenty-two years ago. After the reception Sarah and I spent time at Mimi's home. She captured a photo of Sarah and me having a morning chat in her backyard. She's knitting and I'm working on a "crinkle quilt."
 
The other purpose of my trip was to visit our younger son's family. With them I saw a lot of the Bay area.
 
He, his wife and me above ... me with a grandson on a walk below. It wasn't difficult to take fairly long walks on top of those hills.

I was delighted to spend an afternoon watching my granddaughter play softball ... she's up to bat.

I got my feet in the ocean at the beach in Santa Cruz ..,
and had the opportunity to build a "faery house" with beach debris after a picnic lunch at another beach off Highway #1 on the drive to get there ...
It was a day trip that included my nephew from Nashville and his daughters who were visiting California on spring break. A few mornings later his girls and I built this faery house in the terrace garden of my son's house. Both structures are furnished with a table, bed, chair, and of course flowers in the one below. Wish I had taken photos before the roofs and doors were installed.


Speaking of terraced gardens, I was delighted to visit the awesome botanical gardens on the hillside above Berkeley ...


I had a wonderful time in California. If you plan to visit the Bay area, include a side trip to Lacis. This exhibition runs through October 4th and the shop sells every sort of needlework supply you could possibly imagine, which makes looking through the store very interesting. Here's a quote about the museum by the owner, Jules:
Our exhibits are designed to elicit,  capture and preserve memories. The task of the Museum is to not let us forget.

Jules Kliot, Director
and their location:
Lacis Museum of Lace and Textiles
2982 Adeline Street
Berkeley, CA  94703
and website: http://lacismuseum.org
   

Friday, February 28, 2014

Glass Flowers in My Gardens

At the beginning of the year I had promised to write about the glass project that kept me busy at the end of last summer. About 50 flowers were constructed from dishes and copper tubing. These are the ones I created to bring home to Tennessee ...
And here they are in our sculpture garden under the magnolia tree.

The idea and know-how came from my friend Helen who had given me a flower that she'd created at the end of the summer in 2012. I knew immediately that I had to learn how to make them ... specifically for the metal sculpture garden at our cottage in Michigan.
I've been enamored of glass mixed with metal sculptures since going to the Dale Chihuly glass installations at the Frederick Meijer Sculpture Gardens in Grand Rapids, Michigan in 2010. (To read about that exhibition and see photos go here.)

Here's a close-up of one "flower" head made of finds at thrift stores...
It's composed of a devils egg platter, a pressed crystal bowl and a tea lite candle holder ... with a drawer pull as the center.

I shopped a lot of thrift stores in Tennessee, North Carolina, Colorado, Michigan, and Wisconsin buying glass ware. There's no way to purchase specific pieces to make a flower. It took buying whatever might possibly work. The fun part was playing with combinations ...

It was work to drill holes in the center of each piece. I spent quite a few afternoons in Helen's garage using her drill press.

This is my set-up for assembling a flower ...

The pillows are for cushioning my hands and the dishes. That also raised them off the table so I could build the stack of dishes onto a long bolt ... the head of which came through the underside of the hole drilled in the stem.

But first, the stems and leaves had to be made from copper tubing. The 10' long pipes were cut in half for the tall flowers and in thirds for the smaller ones. One end was pounded flat and drilled for the flower heads. The leaves were formed by bending smaller copper tubing into shape. Here's my set up for welding the leaves to the stem with a blow torch.

Here are some favorite small flowers ...
 The frosted blue piece is a shade for a hanging lamp.

Most of the drawer pulls in the centers are new. Although, I used quite a few that were saved from the doors and drawers I had replaced over the years.

I think there will be a separate garden for the flowers made with mostly clear glass.

I'm thinking the area of mostly beach grass that's tucked behind trees along the shore and sweeps up into the woods below the new deck that was built last summer will showcase them beautifully.

To view just about all the glass flowers I've created go to my Flickr page. There a few that were gifted before I had a chance to take their pictures.


Sunday, February 23, 2014

Soupcon #1 - Border

This afternoon the border that's part of step #4 for my first Soupcon Quilt Along project got sewn on ...
The narrow outer borders are cut from a fine Italian cotton with a tiny print that reminded me of the patterning used for men's ties. So that sent me searching for for the tin full of hexagons constructed from my husband's neckties that I made nearly twenty years ago after he had retired ...


Here they are pinned in place. The actual colors of the silk tie hexagons are a bit more subdued than they appear here.
...and a close-up so you can see the patterning of the Italian cotton.

I really like those silk tie hexagons, but I think they're too large. The edges each measure 1 1/4". I think my evenings work will be remaking them so they're 1"... the size of the hexagons that make up shapes in the focal area. Can't wait to get that done!

Post Script: A comment made on the Flickr site by one of my fellow participants has given me pause. She observed how the "viewer can look through." Now I see that center panel floating over a dark smoky background. Do I want to go with that or carry on with filling that negative space with the hexagons made from the silk ties. I've spent the evening making all of them smaller. I like the look, but just maybe they'll work better into the next step Karen gives us at the end of this next week. So this is it for this project until then.

Update May 8, 2019
Since I had set up a Face Book account whatever I'm working on, plus the goings on in my life have been posted there. Looking back through some of these posts I realize that I need to add some updates to projects that have long been finished ... this one with the hexagons for example. I did end up using the hexagons that I had reduced to one inch. Also this piece is hand quilted  with a diamond pattern.


Antique hand-made fabric buttons are centered in the hexagons within the border. This common element helped to linked them together into a unit rather than individual "spot dots." Visually they receded just enough so the snowflakes are the main focus.


The rest of those hexagons created from my husbands neckties ended up on our three same aged  grandson's "BIG Boy" quilts. I can hardly believe they're all twenty years old .. soon to be 21!


The quilt patterns are all a variation of "bargello" made with shirting and light-weight suiting fabrics.


One grandson request the hexagons be on the "back" of his quilt. He liked the clean lines unadorned on the "front."

I do believe their next quilts will be hand-quilted wedding presents. One of which grew out of that "soupcon" project:


Wednesday, February 19, 2014

My 3rd Soupcon Quilt Along

I could not resist beginning yet another quilt using Karen of Faeries and Fibers instructions for this group quilt along.
It started with this hexagon I had made back in the first week of this group project.

 Soupcon Step 1

I got carried away with the "what if" possibilities and had made a bunch. I had ended up using this one to make valentines. It was printed out on textured paper and then I glued and couched threads to make designs. While doing all that I came across a square of silk I had hand painted quite a few years ago. The color reminded me of roses. So I went digging through the home dec fabric samples and found this piece ...

I scanned it in my printer, cut out one rose and a bunch of leaves and placed them on the hexagon. I liked what I saw a lot.
Soupcon Step 2
Paper cut-outs on left. Machine appliqued and quilted on right.

I had applied bonding to the fabric rose and leaves before cutting them out. The rose and leaves were adhered with a hot iron. The leaves were positioned under the edge of the hexagon and bonded down before it was hand-stitched in place on the background.

I wanted these elements to stand out a bit more on my finished piece so had placed a layer of wool batting on the under side before machine quilting around the rose and leaves. The excess batting was trimmed away.

Now it was time to add the rose-colored ring and background fabric...
Soupcon Step 3

There are a number of ways to make the ring. This is how I did it for this project (I skip this step if the fabric can be spray starched stiff enough to hold its shape).
Many years ago I had purchased this ruler that has holes punched at half inch intervals. By anchoring it into my small ironing pad that is a piece of covered fiber board I can draw my circle. These are the lines that are machine stitched...

The next step is to cut away the excess fabric beyond a seam allowance. Tear away the freezer paper from the inside seam allowance and clip the fabric at close intervals. Note that my scissor points don't go beyond my stitched line.
I use craft glue to adhere the folded seam allowance to the the freezer paper. Note that I fold and glue short sections that are opposite each other on the circle at a time. Repeat those steps for the outside seam allowance. Pin the circle in the desired position and either hand or machine blind stitch in place.

I hand appliqued mine, then machine couched rayon embroidery thread over the edges. (Go here for a tutorial on how I machine couch and scroll down to "couch yarns to the surface"). I used the same stranded rayon floss to embroider around the leaves and the rose.
Also, I wrapped the quilting stitches of the rose petals with this thread.

To my mind this piece begged for "dancing squares" in the next border.
 Soupcon Step 4
I learned this technique in a class taken from Ricky Timms. It goes together something like this...
It's been a while since I had made this type of border and had difficulty getting my spacing figured out. I will be hand appliqueing the two squares pined at the top of the side panels to fill in my too wide spacing.

Go here to see all the creative variations made by the Soupcon group members. If you're intrigued and wish to join the fun of making one of your own, go to Karen's blog to get instructions.