Nellie"s Needles
Showing posts with label Spirit Dolls. Show all posts

Thursday, November 12, 2009

Spirit Doll Party

Today our Thursday bee group had a "Spirit" party to reveal the finished spirit dolls. This included each of us contributing to a buffet of yummy things for lunch. The only spirits to drink were teas. Our dolls pinned to a display board was the center piece at the end of the buffet table
At some point I turned them around to take photos of their backsides.
Eight of us participated in this round robin of dressing and decorating individually made dolls from a pattern I had designed. One of them and her owner, Sandy, were unable to be there.

After lunch each of us presented our doll for discussion by the group. The thing that amazed me was that the completed spirit dolls reflected qualities of their owners. That shouldn't be surprising about those of us who have been long time members, but there were a couple of participants who are pretty new to the group. Each of these beauties speaks pretty loudly about their mistress.

Patty's doll
Tone's doll
Melissa's Doll
Judy's Doll
Deb's Doll
Louise's Doll
Nellie's Doll
I don't have red hair, but I've always wished I did. Tone who gave my doll the dyed cheese cloth locks did not know that about me.

Each of these dolls embody the creative spirit of all who have contributed to them. Mine needs one more contribution ... a name. Any ideas? If your suggested name is selected, it will be rewarded with a gift from my creativity.

Tuesday, November 10, 2009

Spirit Doll Modification

It's taken me a while to notice that Louise attached her spirit doll's head differently from the instructions I wrote. I like her method better than mine. It results in a more natural position and a chin PLUS it's easier to do.
Complete the seam around the head rather than beginning and ending on each side of the neck. An opening for the neck is made by small criss-cross slits cut in the back of the head at the base of her skull. Make short slits ... the size of them can be increased to accommodate the size of the neck. Push the neck into the opening. The head can be turned and/or tilted in various positions. Secure the positioning with straight pins. Connect the head to the body with the blind stitch/ladder stitch.

Oh, how I wish I had thought to do this on the two dolls I made and in those instructions that more than 100 people have downloaded from Scribd. Hopefully, I'll recall to attach the head this way if I make another doll.

Speaking of another doll, I had forgotten that I had taken photos of Deb's doll before she left my possession.
Her's was the first to get a derrier. Someone else had placed embroidery on her chest so that I couldn't give her "yo-yo" breasts. I like the flower tatoos on her rosy cheeks ... and her purple petal hair is "wild".

I can hardly wait to see the rest of these beauties at the "Spirit Party" on Thursday. Photos will be posted that night. You may have noticed that I've added a Picassa album of them in my sidebar. Just click on the picture to access it. I'll add photos of dolls made by any of you out in cyberland to that album if you send me a picture or a link where I can find it.

Saturday, November 07, 2009

Spirit Dolls In the Prairie Flowers

This past week my spirit doll returned home after making the rounds of SMQ Guild's Thursday bee members participating in this project.
So I've been working on her a bit. I stitched her hands together so she can hold the acorn gift that Susan Lenz gave me when I met her in South Carolina last January.

She gained breasts and a derriere made in the "yo yo" technique ... the gathered side placed up and decorated with wood beads for her top while they're placed down to give her a smooth bottom. I also lengthened her tutu skirt by dropping it down and suspending it with lengths of yarn from her waist. A layer of leaves cut from the piece I made for this quilt is sewn to her wings.
The other spirit doll with lovely hair is the last one passed to me. One of my additions was to lengthen her tutu by stitching silk flower petals to the hem. While I was at it, silk blossoms with silk ribbon centers were added for decoration.
She, too, gained a yo-yo derriere. Her skirt is parted to give you a better view.
I couldn't resist posing them in front of the two latest prairie flower mini quilts.

All the spirit dolls will be brought to bee next Thursday. Come back then to see pictures taken of all these beauties at the "spirit" party.

Tuesday, July 28, 2009

Voodoo Dolls and a Spirit Doll

Over the July 4th weekend one of my grandsons announced he had a sewing project. He has designed and sewn enough that he knew what to do when I gave him a sheet of paper. He drew an outline of what he had in mind which became his pattern. I got out the drawer of fabrics put together especially for my grandchildren to create from. He chose his fabric and got busy cutting and sewing while I continued quilting one of the Prairie Flower panels.
When his brother came up from the beach he too wanted to make a voodoo doll. They play a computer game that involves these plus magical staffs. Earlier that day they had each found bleached sticks on the beach and decorated them with feathers, and braided beach grass.
Walla! Here are their completed voodoo dolls.
This seems to be a good post to include a photo of one the spirit dolls that is part of our SMQ Thursday Bee round robin.
After adding my touches I couldn't resist posing her on a Prairie Flower panel. My contributions are her breasts made from silk leaves (yo yo style) and small silk flowers encased between the two layers of her organza skirt. I couched the bottom edges of those two layers together with an angora yarn then made a belt with angora streamers and beads. Of course, I really had no time to be doing this, but I needed to play!

Monday, June 08, 2009

My First Spirit Doll

... was made reluctantly a number of years ago at Arrowmont.
It was an exercise to start the flow of creativity in a week long workshop, "Healing Art", conducted by Susan Shie and James Accord. At the end of the orientation assembly the night before, everyone in our class was instructed to bring a sock to class. I was a bit put off when we were told to spend the first day making a sock doll. There was no instruction other than to make the doll. It seemed a waste of time because each of us had already spent a lot of time and effort to prepare for creating a specific piece of art that dealt with healing.
Somewhere I have a group photo with my classmates and their dolls. One that has really stuck with me is a most gorgeous beaded mermaid doll made from a grungy tube sock.

I don't know why, but the first thing I did was to turn my sock inside out. The extra lengths of thread where the knitting changed colors intrigued me. As I stuffed and shaped her body, childhood memories began to surface. For some reason I could not explain, I just couldn't give her arms. She was endowed with all other female attributes, including underarm hair. She even got a cute little hat made from the top part of the sock.
I stayed late in the studio to finish her ... there was going to be no more time wasted on a sock doll when I had a BIG serious project to work out. Just before I fell asleep, the memory of making a sock doll when I was in a children's home hit me. I really, really wanted a doll. The only way I could have one was to secretly make it and her clothes from my socks. It's pretty certain that I did have some thread and a pair of scissors. She was probably stuffed with a pair of panties. Of course, I had to hide her and could only play when everyone else was asleep. The disappearance of my socks was a mystery to everyone else.

The second day of class opened with a discussion of our experience in making the dolls. Then we were told, what by then was obvious to each of us, that the act of creating a doll with no instructions or outside input was a way of opening channels of creativity on a deeper level.

The theme for my healing art quilt was my broken family, which is why my siblings and I were in the children's home. Making the sock doll opened a floodgate of memories for those years over half a century ago. That quilt was never finished, but the process of creating it brought a closure for a difficult and painful childhood. This spirit doll is a presence in Studio South. Can you spot her?


Thursday, June 04, 2009

Spirit Doll Update

The spirit dolls have changed hands three times.
These first two pictures are from Patty. She's in charge of the exchange.
My contribution to each is a pair of breasts since I didn't include any when I designed the pattern*.
They are made "yo-yo" style, stuffed with a circle cut from batting, and have nipple decorations to conceal the hole and stitching where the fabric is drawn up.
This one was given "Bee" wings and button buttocks by one of the participants before I got her.
What are the chances of my finding a fabric in my stash that matched the dolls body so well that she looks bare breasted?
We Thursday Bee ladies are having fun!

*click on the word "pattern" to be taken to the introductory post for the Spirit Doll. There are two links at the end of that post ... one for printing out the pattern and the other for printing out assembly instructions.

Saturday, April 04, 2009

Spirit Dolls

I mentioned at Bee that it would be fun to do a round-robin exchange with spirit dolls. Everyone was agreeable IF we had a pattern. Since it was my idea, making a pattern for the doll is up to me.
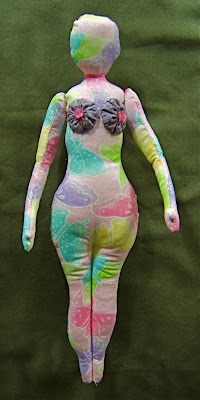
On the left is the outcome of my first draft. On the right side is the result of my finalized pattern for a 12" tall doll.
There is no doubt about her gender in spite of her lack of breasts. I figure at some point during the rounds she will acquire a set along with a lot of other interesting and decorative goodies.

I've come up with a different method for working with this pattern from the way I instructed making the bird. Both patterns are transferred to a wax backed freezer paper. The cut edges of the doll pattern pieces are the seamline.
I use a light box to position the freezer paper pattern over the area I like on the wrong side of the fabric. After the pattern is ironed to the fabric rough cut at least a 1/2" allowance around the pattern. I again use the light box to position the pattern with the ironed on fabric to a "good" spot on the right side of the fabric. Then again rough cut the fabric at least a 1/2" from the paper edge. It's very easy to sew the seam at the edge of the pattern with an open toe foot. I shorten the stitch length to "2" on my Pfaff machine. The seam is stitched all around the pattern piece (do not leave an opening for turning). Trim close to the pattern with pinking shears.
If you don't have pinking shears, it is necessary to clip into the seam at the curves so they will be smooth when turned inside out. The sharp inwardly curved seam between her feet needs to be clipped that way.
To turn the body inside out I drew a 2" long line in the middle of her back to cut an opening.
Using tweezers is helpful to grasp narrow ends to pull them through the body and out the cut opening. After the body is turned right side out draw a 5" long line from the toes upward to give her two legs. Stitch a seam along the line being sure to secure the thread ends.
The arms are cut and sewn the same way ... a closed seam around the pattern. The slit for turning is made at the top in the area that will be sewn next to the body.
The pattern for the head is laid out on the fabric and sewn in the same manner. Leave an opening in the seam at the chin for the neck on the body shape to fit into. Cut excess fabric in the shape of a neck at the opening. The dotted line represents the placement of the stuffed neck when the head is attached to the body.
Turn all the body pieces right side out. Use a fiber-fill to stuff the arms, head, and body. The opening of the back is closed with the ladder stitch. Take a running stitch on alternate sides of the opening. A number of stitches may be made before drawing the seam shut.
Sew the arms in position with a ladder stitch seam from the center of the front up over the shoulder to the center of the back. This allows mobile arm movement.

Tuck the excess "neck" fabric inside the opening of the head. Position the head over the stuffed neck on the body. It's a bit fiddly. Use the needle to help stuff and smooth the loose fabric.
Use the ladder stitch to attach the head to the body. I stitched the backside first, then added more stuffing to puff out the face before stitching the front closed.
And that's how to make a spirit doll. She's ready to be decorated and embellished however her maker wishes to portray her persona. I'm looking forward to my friends each adding their unique touch to my doll ... bits of their creative spirit.
The pattern and these instructions can be downloaded to your computer and printed out... just like for the bird.

  • Go here for the pattern
  • Go here for the instructions