Nellie"s Needles
Showing posts with label Wild Flower Series. Show all posts

Thursday, May 22, 2014

Four More Violet Pieces

added to my wild flower series ...

All these had begun as a single whole piece. It was the size of the one donated to the charity auction that I wrote about in my last blog post. At the end of two full days work, I did NOT like it at all! I went to bed with the thought of closing up my studio for good ... thinking maybe I had "lost it" and should consider going back to making functional quilts. For me the designing process to make those is less complex and frustrating to get satisfactory results.

But the next day I had a different thought ... cut it up! It's the woods in the distance that I fell in love with at the beginning of this series. It's the part I liked best in the first one. Particularly at the beginning of building that piece.


 beginning of Violets #1


So ... it was cut in half. I allowed a bit of foreground space for patches of flowers. Pieces were cut from the right and left sides for the sake of the composition, I worked on the woods a bit more, added the violets to the foreground, and then bordered it with a frame made from the piece that had been cut from the center of the frame for Violets #1. Three green skeleton leaves were added for balance in the bottom section of the frame.   Here's the result ...
Wild Flower Series - Violets #2 (17"x 12.5")

The bottom section of that cut apart piece had a real birch bark piece. This was my main consideration for how to size the next picture in this series. The leaves had been sewn in place on the original so that was also given thought. I chose to use the perspective of "bending down close to see the violets" in this one.  It's bordered with what had been cut away from the center of the frame for Violets #2.
Wild Flower Series - Violets #3 (13"x 8")

Well ... now I had the quilted center that had been cut away from the frame of the above piece. This prompted me to stitch together the two sections cut from the sides of the woods in #2 to create this vignette to fit within it. Just a bit more work and it became my favorite in this whole violet series.
 Wild Flower Series - Violets #4 (5.5"x 8")

I was definitely back in the groove and happy to be in the studio by this time ... that being a few days later. The previous small piece made me fall in love with making art again. Composing this one from the last section of what had been "cut up" came easyMy perspective on this one is "I can almost smell those blossoms."
Wild Flower Series - Violets #5 (9"x 8")

These four pieces that were intended to be a single large one are destined to the gallery in Michigan, Good Goods, for their special 25th anniversary exhibition in mid-June. I've since made two more pieces for this occasion. I'll post about those next.

Sunday, May 04, 2014

Violets #1

A year ago my wild flower series was begun with five pieces featuring trillium. This spring I'm continuing it with violets. The first was completed today ...

"Wild Flower Series - Violets #1 (21"x 17")

Last years series featured a micro view of the flowers on a woodland floor. I began this new series with a long view of the woods in the distance ...
How the light filters through the stands of trees in the spring intrigues me. I love  the sprinkle of new leaves ... so many of which are yellow and orange and of course, bright yellow green. Here in Tennessee there are Dogwoods blooming in the understory of trees, so they're there, too.

A bright green tulle was quilted over that stand of trees and undergrowth in the upper half of the piece while a camouflage printed tulle hold all the bits and pieces of my composition on the bottom half. The log is a piece of actual Birch bark.
Leave shapes and violet petals were cut from disassembled silk flowers. I glued pieces together to form the blossoms. They and the leaves are just laid on the surface in this picture to test  the composition. I wanted to present the perspective of leaning down to admire ... and pluck ... a small cluster of these delightful blooms.

Here I've captured the leaves with quilting under green tulle. The excess netting was trimmed away close to the stitching. The leaves were then shaded with pastels and defined with paint.

I cannot tell you why I changed the arrangement of the flowers from how you see them in the previous photo ... extending their stems above the clump. I suspect it's how they're suspended from the curve at the top of their stems that swayed me. I'll revisit that first arrangement for the next piece in this series. It was at this point I started to think about the possibility of a border and where the edges of the composition could be.

From the beginning it was in the back of my mind to mount this piece on a stretched canvas frame.
That involves another layer of quilting to hold the finished art to a separate piece of fabric that wraps around and is stapled to the wood frame. I cover those staples and raw edges with Duck tape.

I made this piece specifically for the charity auction, "Art in the Garden" on June 16th to raise funds for Random Acts of Flowers here in Knoxville.
Random Acts of Flowers (RAF) is a non-profit 501(c)(3) charity improving mental health through the power of giving flowers. RAF volunteers collect donated flowers from weddings, memorial services, florists, special events, grocery stores and churches – to recycle and repurpose them into beautiful bouquets for delivery to patients in area hospitals, nursing homes and hospice care centers. As a recycling “green” charity run almost entirely by volunteers, Random Acts of Flowers is committed to nourishing the health of the environment, individuals, and the community.
What could be better than for me to create an art piece for them with recycled flowers and leaves plus bits of fabric from other people's quilted projects.


Go here to see blog posts about the trillium series.


Sunday, May 19, 2013

Another Trillium Patch

I had a bit of time to complete the two trillium pieces that incorporate the real birch bark before having to get busy with a big commitment before we leave here for the summer. Here is one of them ...
The trillium in these two have bright yellow green shading in their centers. They'll be mounted on the large leaf print to finish them. That will get done when I go to the cottage, since they're destined for Good Good's Gallery in Saugatuck, Michigan.

In the meantime, I'm knee deep in smocked clothing and boxes of "paper." A whole lot of my smocked stuff is being donated to the Lacis Textile Museum's (Berkeley, California) permanent collection. An exhibition featuring smocking is scheduled for early next year. Getting my donations documented, and packed to send off before we leave is taking a lot more work and time than I had imagined. I'm not having any fun with this and fantasize about dumping it all in boxes to let them sort it out. This means I most likely will not post here again until I'm relocated up north.

Monday, May 06, 2013

Different Kind of Orts

When I was at the Cliff Dwellers Gallery Theresa Tyler was stripping birch bark to make hand crafted baskets in her studio space. While we were talking she was discarding that outer papery white layer.  Before I left I asked if I could glean her waste basket of what I considered to be the "good stuff." This is what I brought home.

You'll note there's also some marbled paper scraps strewn among the bark pieces. Pat Thomas, another of the gallery co-op owners, does marbling. I emptied her wastebasket of those. The pieces with blues are now stashed with the bags of orts set aside to make lake pieces.

The two new trillium pieces have "birch sticks" in the foreground. Here's one of them with the first layer of orts trapped under yellow tulle ready to be quilted.
"Trillium Patch #4"

Sunday, May 05, 2013

More Trillium Patches

I've become enamored! There are two more trillium textile art quilts that I finished and delivered to the Cliff Dwellers Gallery in Gatlinburg this past weekend.
 Trillium Patch #2

 Trillium Patch #3

Both of these began with my dividing one of the pieces of fabric on which I had made rubbings of huge leaves that were collected along the Mississippi River with gold and silver oil paint sticks back in 2008.

Here are both of them with the first layer of bits and pieces of scrap fabrics, thread ravels, roving, and skeleton leaves
... before they were trapped with a layer of yellow tulle netting. I then machine quilted around the outside edges as well as the shapes and lines.

Here you can see I've added leaves, stems, and grasses that were shaped from fabric scraps and disassembled "silk flowers" (collected from thrift shops) to the quilted foundation piece on the right in the picture above.
The next step was to trap those pieces with green tulle by quilting around their shapes. The excess tulle was trimmed away between the leaves so as not to "muddy" the background.

The border fabric is linen that I discharged a number of years ago. Real fern fronds were scattered across it and then a strong bleach solution was spritzed over all. The bleaching action was stopped by immersing the fabric in a bucket of vinegar and water. At that time I discharged all the yardage I had of this linen with various patterns, some of which was used in "Come With Me to Kasbah" and "Fading Memories". I love the copper color of the bleached areas. I had gone back to the store to purchase more, but it was GONE.

The first hanging, "Trillium Patch #1" sold before it was finished to one of my blogging friends. There are two more foundations using another of those pounded big leaf fabrics layered and laid out to make numbers 4 & 5.

Wednesday, May 01, 2013

Happy May Day!

 "Trillium Patch" 18"x 18"

It's finished except for the hand-stitching of sleeves and pockets for the hanging apparatus. I like the contrast of the dry ashy colors in the border with the warm ones in the coming to life area. The contrast of scale between the border print and the trillium patch, as well as the contrast of the clean edge on the outside versus the fuzzy organic around the focal piece pleases me, too.

Friday, April 26, 2013

Trillium Patch

My little trillium patch is complete ...


The stamen are embroidered. I used several shades of yellow floss in the 6-ply strand to stitch a variation of the bullion knot. I opted for irregularity in those stitches to reflect reality of perspective and nature. Also, the trillium leaves have been highlighted with oil stick pastels as well as shaded around the edges with a dark blue water color pencil.

Now to decide on the finishing. I'm excited by this idea ...
This afternoon I'll be playing with the placement of the trillium piece over the yardage of batik that has the effect of discharged leaves. I'll consider making my own discharged leaf fabric if I change my mind about the scale of this one. Right now my thought is those large "dead" leaves in the border complement the focus piece and add to the story. After all, old dried leaves are what I saw most on my recent woodland hike ...


Thursday, April 25, 2013

Trillium

I'm liking this piece a lot!
However there were moments I considered scrapping it ... which means eventually cutting the woodland floor background into pieces for something else. My problem was that every color of tulle I placed over it to hold the sprouting plants in place "killed" the woodland floor hues. The whole piece just "died."

The solution was to choose the tulle color that enhanced the new growth parts ... that one is the bright yellowish green one...
It was pinned to cover the whole top. I stitched/quilted around the greenery then trimmed the tulle away from the woodland floor sections.
Well, most of it. I see that some more needs to be cut away. Do you see how the color is lost in the upper left corner in the above photo? Think I'll be trimming that away. Pieces of white tulle were placed over the blossoms, then the excess trimmed away after free-motion stitching around the petals. That stitching also anchors the calyx pieces which are loose on the surface. Some new growth pieces float on the surface as well.

Now I'm really excited about this piece. Next the yellow stamen will get embroidered and I have an idea about framing to pursue.

Wednesday, April 24, 2013

Sprouts on the Woodland Floor

I very much liked the foundation of scraps for this wild flower piece.


I have a lot of colors of tulle to select one to hold all these bits and pieces together ... and I debuted them all.


The grayed lavender is the one that worked best to my eye.
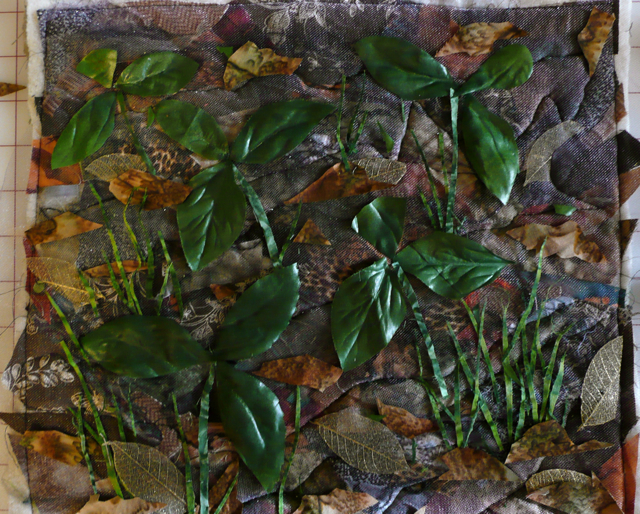
I quilted around the outside edges and just enough organic style lines through the center area to keep all those bits in place. Then I added newly sprouted plants along with real leaf skeletons and more scraps of fabric.

I have a huge bag of silk plant leaves. I kept digging until I found ones with the right hue, sheen, and veining. Very rarely do I use any "whole" leaves. You can see where one of the leaves for my plants was cut from that large one on the right.

Can you guess what the flowers will be from my leaf formations?


Monday, April 22, 2013

A Bit of Earth

I've had in mind for sometime to create small art quilts featuring spring flowers. A week ago after a picnic I took photos on a trail walk along the Clinch River ...


The coming of spring here in east Tennessee has been late. There were no new leaves on the trees and just a few sprouts of early wild plants.

Yesterday afternoon I got a start on creating the foundation for the first quilt. On the left is the first step of covering the batting with pieces from my scrap bag ... I think of it as "under painting"...


A second layer of thread and yarn scraps, plus scraps of tulle netting have been added. Now to do just enough quilting to hold it together, then I'll continue to build the picture. I still haven't decided which flowers will be growing through my woodland bed.

Just a reminder about the contest at the Quilting Gallery. Go here if you haven't yet checked it out.  Voting for 4 favorite quilts from the 37 entries and entering the fat quarter give-away deadline is 6:00 p.m. (EDT). Have fun and good luck!