Thursday, February 13, 2014
Wednesday, March 09, 2011
My Plan for ArtPrize 2011
 I sketched in the divisions on the army blanket that serves as the bat ... keeping in the spirit of recycling materials for my "ortwork" technique.
Tuesday, March 09, 2010
Playing With Scraps
The strips got laid out and moved around until the arrangement looked good.
I decided to couch yarns in a vertical pattern to bring even more cohesiveness to the overall design ... and had begun doing that before remembering that I wanted to document my process with photos. I took a picture before more than two rows of yarn got stitched on.

I mixed a bit of fine gold Perle Ex Pigment with acrylic medium and brushed it on the surface. This strengthened the tissue and will make it impervious to moisture, as well as give it a bit more shine.
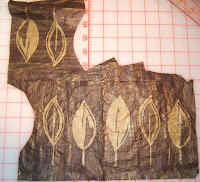
After cutting out the paper leaves I recalled that I had a stash of leaf skeletons tucked away in a basket on a top shelf.
Here the paper napkin and skeleton leaves are arranged on the surface.
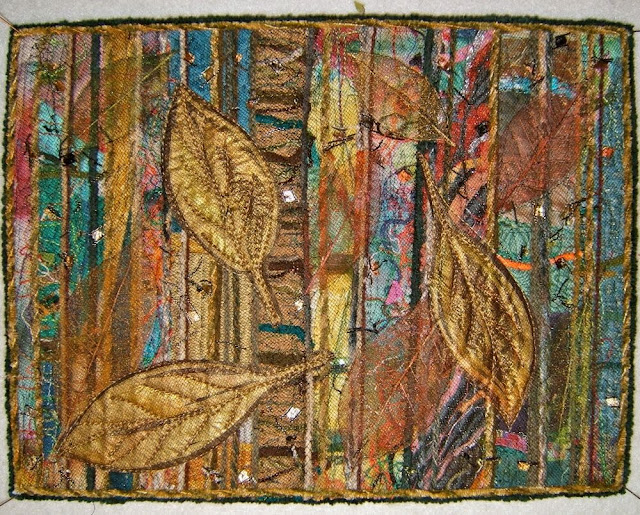
Some decorative yarns are snipped into little pieces for additional interest. Then a layer of brown tulle was placed on top to hold everything in place. I quilted the background with a dark mono filament thread in a bark-like pattern. The paper leaves are quilted with a variegated gold thread. The last thing was to square it up and finish the outside edge with couched yarns.
Wednesday, November 04, 2009
More Mini Prairie Flowers
More mini quilts made with the pieced together cut-offs from "Prairie Performance" as their foundation have been created. I position the main elements, such as the blossom, stems, leaves, and of course Elvis on the background first so I can determine a "point of view" or perspective. Those get removed so the background can be filled in with more scraps of thread and fabric. A layer of netting is laid over that and then it gets quilted.
 Most of the flowers and leaves that are the focal point or in the foreground are machine appliqued onto the surface so they're dimensional.


 That makes 12 of the 20 I intend to make. Five of my friends who've contributed scraps that were used in the prairie flower installation received their quilts after our SMQ Guild meeting last evening. One got hers last weekend when we were in the mountains. Tomorrow several more will get their's at Thursday Bee. Only 8 more to make.
PS: Did you find Elvis in each of those?
Posted by Nellie's Needles at 2:38 PM
Labels: "Ortwork" Collage, Prairie Flowers, Shared Art
Monday, October 26, 2009
Mini Prairie Flower Quilts
I found a project. Making mini quilts that feature prairie flowers. I figured that I might as well do this while all the supplies from making "Prairie Performance" are not yet put away and I'm in the groove of working with them. It surprises me that I'm not sick to death of this theme. I guess those flowers are not yet out of my system.
Their foundations are made from the pieces cut off the 25 panels when I squared and trimmed them to their finished size of 23"x 24". Whatever else would I do with those trimmings? At any rate, I just cannot discard them. Here are five sets laid out. The bottom one's strips are sewn together with a zig-zag stitch.
 And here's the stack of twenty foundations cut from those stripped together pieces.
 The first one I made features daisies. I was disappointed this favorite flower of mine was not indigenous to the prairies of northern Illinois. Consequently, there are none in the installation piece.
I'm making these as thank you gifts for my friends who've contributed scraps that most likely ended up in the BIG prairie flower quilt. I think they'll appreciate having these small quilts made of scraps and leftovers from "Prairie Performance".
As you recall, Elvis was tucked in a number of places on the big quilt. Each of the mini ones will have an Elvis cut from this chiffon scarf hiding among the flowers.
 Here's one. Can you find the other in the field of daisies?
Posted by Nellie's Needles at 10:10 PM
Labels: "Ortwork" Collage, Prairie Flowers, Prairie Performance
Saturday, September 05, 2009
"Lofty" Work
Our older son was fascinated by the loft of all the bits and pieces layered on the prairie flower panel I was working on last evening. He got out the camera and snapped a few shots.

Posted by Nellie's Needles at 3:51 PM
Labels: "Ortwork" Collage, Prairie Flowers, Prairie Performance
Saturday, May 23, 2009
Scraps, Lots of Scraps, Bags of Scraps
For years I've been making art quilts with a collage technique I call "ortwork" ... a play on the words artwork and ort which is the British term for scraps. I look at all of these bits and pieces and see potential "brush strokes".

 My older son designed a grid template on Photoshop for me to drop a photo of each piece into place as it's completed. I am so thankful for this invaluable design tool. Without it, there would be no way for me to see all these panels together and how they interact as a whole piece. Otherwise, the only time I'd ever see them in their proper orientation would be when it's finished and installed on the wall of a lobby.
Here's a close-up of one panel that measures 24"x 34".
I'll post my progress throughout the summer.
PS: For an occasional break I may whip up a lake quilt from the heap of scraps. I haven't made one of those since #68 last fall in Studio North.
Posted by Nellie's Needles at 12:24 AM
Labels: "Ortwork" Collage, Prairie Flowers, Prairie Performance
Saturday, April 25, 2009
Mountain Quilt Finished
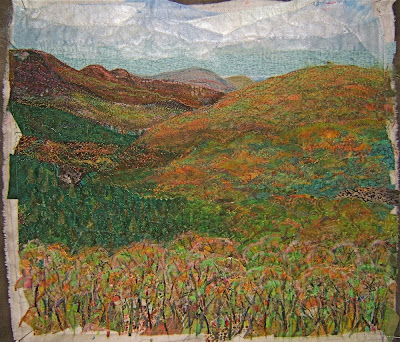
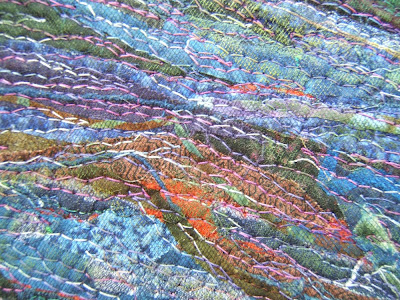
I thought you may like to see the stages to complete this "ortwork" collage piece that features the Smoky Mountains. The background pieces from my scrap bag were laid out to establish the basic placement of the mountains, groves of trees, and sky during the Friday afternoon demonstration at the gallery in Gatlinburg. I had in mind to portray the new growth that I had observed on the drive to the mountains. This step is akin to doing an "under painting".


Thursday, March 26, 2009
Flowers For Me


Friday, March 20, 2009
More Flowers
This is the way my "ortwork" flower pieces begin.

At this point one layer of netting has been applied and quilted just enough to keep all those bits and pieces in place on the background. I'm building another layer with flowers, stems and leaves plus more texture.

Posted by Nellie's Needles at 5:04 PM
Labels: "Ortwork" Collage, Prairie Flowers, Prairie Performance
Saturday, March 14, 2009
Wednesday, March 04, 2009
"Our Biosphere Reserve"
This is the result of my "playing" with all those scraps.
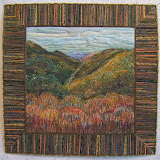
This art piece features my interpretation of the view from "Morton's Overlook". In the spirit of conserving our biosphere's resources this quilt is made from recycled or repurposed materials. The picture part is composed of fabric scrap bits and pieces from previous projects, both mine and other peoples. The foundation structure features an old blanket as the batting and upholstery fabric leftover from a friends project is the backing.
It took concentrated effort to meet the deadline of presenting it at the Smoky Mountain Quilt Guild meeting last night. This was one of twenty-one quilts competing for inclusion in the SMQ Guild's entry for the Ultimate Guild Challenge in the AQS summer show. The theme chosen by our guild for its entry was "Go Green", which was open to interpretation by each participating member. Leah Marcum-Estes, director of the Oak Ridge Art Center, was invited to be the juror to select the eight quilts for this entry. We certainly presented her with a challenge to choose only eight from so many wonderful quilts. I'm pleased my quilt was one of those selected to represent the Smoky Mountain Quilt Guild.
The SMQ Guild has won awards in three previous AQS Ultimate Guild Challenges. To see the quilts for the year we won the Grand Champion Award ($5000) go here. To see my quilt contributions for the other two award winning years go here and here.
Posted by Nellie's Needles at 12:10 PM
Labels: "Ortwork" Collage, Smoky Mountain Quilts, SMQ Guild








 Fabric Bird Sculpture Pattern


