Recommend You See
I don't have the time to post about my quilts at this time. I do recommend you go to see this young English woman's fabulous pictoral quilts at
I don't have the time to post about my quilts at this time. I do recommend you go to see this young English woman's fabulous pictoral quilts at
My time right now is chocked full of deadlines. This next Friday, June 30th, a wine reception featuring my "Crinkle Quilts" is taking place at the gallery, Good Goods, in Saugatuck, Michigan. YEAH! WHOOPEE! My first ever! Also, we're hosting a family reunion here at the cottage. The first event for our gathering is that wine reception.
Just a quick posting today. This is for those interested in how I set up and mentor my grandson's sewing on the machine.
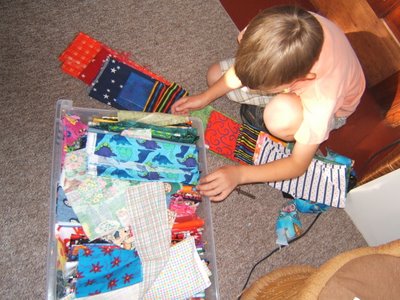
Winston spent a week here at the cottage. Much time was spent in the studio. Although, if he had his way it would've been even more. He had decided to make a quilt ... a pretty big quilt. The first step was to choose 20 fabrics from the drawer full of novelty prints. I cut his choices into 6" squares. That was enough "sewing" for one day.
  Most of the next day was spent arranging and rearranging those squares on the design board. I recall at this point he decided 5 more were needed. He had fun looking through the reducing glass and the wrong end of my studio binoculars. He actually determined where changes and additions were necessary by "seeing them from a distance".
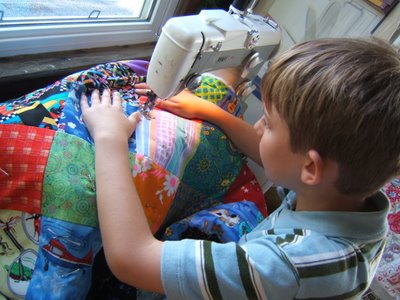
 I got busy with my own project and neglected to take photos every day. The sewing machine was set up on a low end table. Winston was able to sit at the machine in a childs sized chair. We went through the basics of sewing machine operation. I taped a stack of post-it sheets next to the edge of the sewing foot to help quide the fabric. After he had sewn the length of 2 strips together that had been trimmed from one of my projects, he had full control and began piecing his blocks.
I was adament about determining where 2 pieces were to get the seam while they were still on the design board. I instruct the 2 blocks be viewed as pages in a book, then for him to close the book and and take both pieces off the board together with his fingers only on the edges that get pinned where a books spine would be. Winston took the pair of blocks to a flat surface and placed 3 pins. He took care to match the edges and all of his seams were PERFECT. There was a bit of a challenge sewing rows of blocks together. He got the principle of opposing seams and just about all the blocks matched.
He got a kick out of using a sliver of soap to draw quilting lines across the diagonal of the blocks. We tried the chalk wheel, but the lines didn't stay on the fabric long enough.
On his breaks from sewing, he poured over the instruction book for that Pfaff 360. At some point he got the hang of threading up the machine and using the built-in needle threader. He gets to finish the quilting in his mother's studio on her old sport Bernina machine. Says he'll wait to sew the binding on with me.
Whew! I'm back. Our younger son's family had been here for a week plus. It was fun getting Tessa (5) and Winston (7) machine sewing quilts. I'll post about their and the the twins projects done already this summer in the near future. Both son's families just left for Chicago ... and WHEW! here I am.
I was so pleased that I could "make waves" using Karen Eckmeier's Layered Curves technique, and I just had to see if I could do it again. Or was I just lucky the first two times (refer to two previous postings). The instructions in AQS's magazine, American Quilter (Summer 2003) are extensive, including tips about perspective, values, and the effects of a chosen format (vertical/horizontal).
 "Untitled" - 13"x14" - 2005
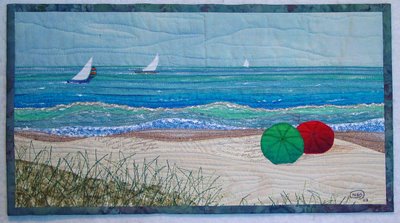
This is the second quilt scene I ever made. I could hardly believe that I could make the lake look so real the first time, so I had to try it again. The first one (previous post "I'm Here") looked like a storm approaching across the lake. For this one I wanted to make a sunny afternoon with a nice breeze ... a perfect day on the beach ... a perfect day for sailing. And, could I make umbrellas that didn't look like beachballs? Yes!
 "At the Beach" - 9"x17" - 2003
 You may recognize this view from the quilt featured in the posting "I'm Off". I hadn't worked from a photo when I made that piece. I just looked at and studied everything each time I was at the beach.
 This is the widest the beach has been in the 45 summers that I've been coming here. Definitely have to wear beach shoes across the hot afternoon sand. Our cottage is the one on the far right.
Posted by Nellie's Needles at 8:44 PM
Labels: Art quilts, Beach, Couched yarns, family, Home/Family
We have arrived in Michigan. It hardly seems as if we had ever left. Our young families did a good job "opening" the cottage over Memorial Day weekend. So good, that for the first time in all the 45 summers that I've been coming here I felt that I could just move my stuff in and do "my own thing". The first evening of our arrival I had my Brother s1500 set up and was quilting. Yeah!
Posted by Nellie's Needles at 10:46 AM
Labels: Art quilts, Beach, Couched yarns, family, Home/Family

