Caryl Bryer Fallert Workshop
I got "comfy with curves" in a wonderful day-long workshop with that title conducted by Caryl Bryer Fallert this last Monday.
 9"x16"
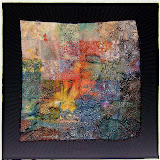
The morning was spent drawing/scribbling a variety of lines. Our first task was to recognize the type of gestural line that was unique to each of us. A smooth flowing arc kept appearing in most of mine. The next thing was to isolate parts that were personally appealing by moving a variety of small window openings cut into a sheet of paper over the drawings. Then the fun of adding and erasing lines to the selected section began. I came up with this design.
Before lunch break we drew our design onto a transparent film. This was projected on the wall to the size of the finished piece. I determined the size of mine by the width of the freezer paper it was to be transferred to. Plus the fact that this was a one day class and I really wanted to get most of it done that afternoon.
 The afternoon was spent cutting, glueing, and sewing. But first we marked our paper pattern with orientation marks plus any other designations for value or color. Even though I had taken a quite a selection of fabrics to class, I ended up purchasing and using a piece of Caryl's dyed fabric. I cut all the parts for this design from that one piece of fabric.
 The technique for sewing these graceful curves is called "applipiecing". It was fun ... like putting together a puzzle ... and it was easy to sew. The challenge was keeping track of all the parts.
My next posting will show how this piece ended up.
*All photos are clickable for you to view a larger version in a separate window. Click the back arrow icon of your server to get back to this post.
*The red highlighted text is also clickable to take you to the link or posting that is being referenced.


 Fabric Bird Sculpture Pattern


12 comments:
Wow, Nellie, you seem to have gotten a lot out of this workshop! Great design; love the way you got every color from one piece of fabric.
This looks like an interesting workshop -- the approach is very appealing. Can't wait to see the next post on this.
Great workshop! Great piece. Thanks for showing us how you developed the drawing.
Thanks for the explanations. I'm sure that it would be very interesting to learn this tecnic I'm waiting for the way it will develop. Ciao ciao and have a nice week end.
You are so fortunate to be able to take one of her workshops. I really admire her work. It looks like you will end up with a wonderful piece and a lot of new knowledge. The first part of designing looks like an amazing exercise.
This looks yummy! What fun, curved piecing whew! I love that all these vibrant colors are from the same cloth. WOW.
Your piece looks like it will turn out to be another winner- and the fabric you got from Caryl makes me rather envious! I'd love to be able to create fabrics as luscious as this!
Are you familiar with Sharon Schamber's method of doing curves? I was wondering if Caryl's was similar-
Please be sure to post the finished work!
Hi Nellie, what a fun day you had in that workshop..*VBS* I rather like that, the shortness of the time frame, the very hands ON approach, and I think your piece will be spectacular! Love those curves..*S* Hugs, Finn
I'll be back to see the outcome
Wooowww!!!Wonderful!!!thanks for the explanation,Nellie :)))
Thanks for telling about your workshop experience! I've never heard about "applipiecing" before. Is it able, to explain it a little?? Your design is fantastic!
greetings from Germany, Brigitte
Brigette,
Caryl developed applipiecing in 1989 to construct the curves in her marvelous quilts. Basically, it involves drawing the sections of the quilt on the freezer paper, making marks cross the lines, and cutting the pattern apart. Then the freezer paper is ironed onto the fabric. The seam allowance edge of one piece is folded and pressed under the freezer paper, then it is placed over the seam extension of the piece it fits next to making sure the cross-hatch marks are lined up. The pieces are then machine appliqued together. It's one big puzzle.
what a great quilt, looks like you had fun at the workshop! Can't wait to see how the pieces on the floor end up :)
Post a Comment