Nellie"s Needles

Friday, May 18, 2012

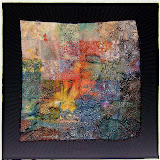
Orange and Gray Lake Series

This mini-series of lake pieces featuring orange and gray was inspired by a pair of hand-felted slippers.
One of my friends had posted a photo of the slippers on Facebook. I was intrigued by their color and the gradation of the hues from orange to gray. I couldn't get them out of my mind. A few days later Good Goods gallery that carries my artwork in Saugatuck, Michigan put out a call to all their artists to create new pieces for a special show titled "Lake Time." It didn't take long for me to know exactly what I wanted to do ... create three new lake pieces based on the intriguing hues of those slippers. The titles are "By the Light of the Moon," "At Daybreak," and "After the Storm." Each measures 21"x 17" and are mounted on stretched canvas frames. I'll post more about each of these pieces in the near future.

Tomorrow night is the opening reception for this show that celebrates Good Goods twenty-third anniversary. If you're in the area please come. It's from 4-8:00, Saturday, May 19th.  Go here to see photos of some of the other art created especially for this show.


Oh ... I ordered those slippers all the way from Lithuania and am considering wearing them to the party.

Friday, May 11, 2012

"Quilts For Mom" Quilting Gallery Contest

Once again I've entered one of my quilts in the Quilting Gallery's weekly contest. I never enter with the intention of winning ... which I haven't so far ... but as another way to share my work with more quilters around the world. Go here to see the other entries for this weeks contest and to vote for your favorite. Check out my favorite one that's titled "Mom." It's created by a Michigan artist who also loves to recycle fabric and stuff into her art.

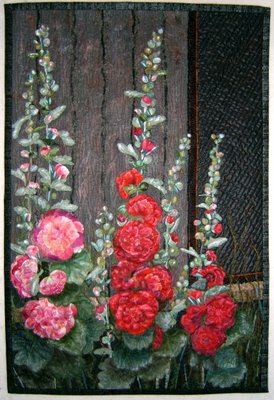
 "Hollyhocks" - 18"x22" - 2004

This is another "ortwork" piece that was my answer to the challenge of interpreting a photograph. The blossoms are made from cut apart and reshaped silk flower parts. It is detailed with pastel oil sticks and paint. Many of the leaves are reshaped from the silk plants. The small ones are shapes cut from interior decorator fabric samples. This was purchased by a friend in Knoxville and hangs in her bedroom.

PS: This entry won the Quilting Gallery contest. Thanks to all of you  who voted for it. The black roses quilt that got a whole lot of votes was not eligible to win ... ???

Thursday, May 10, 2012

A Tropical Garden - the Beginning

The foundation for a new piece featuring a garden of tropical flowers was created yesterday. As usual, it's made up of recycled materials in the technique I call "ortwork". Scraps of silk sari fabric samples are arranged over an old woolen blanket with a piece of someones excess upholstery fabric as the backing.
Laying the silk pieces was like working a puzzle to cover the whole surface. Then I got out a container of thread and yarn ends/tangles to add a vertical element to it. Camouflage printed netting was layered over it all, then sparsely quilted to create a shadowy depth for the upcoming garden of flowers.
I couldn't resist playing a bit with various hues of tulle and a few flowers over that background piece on the design wall before packing up all the materials. Building layers to make a lush garden of tropical flowers on this piece will be done in Michigan.


Tuesday, May 08, 2012

Playing with Paper Piecing

I had a few days between my last big project (more about that later) and getting ready to move north for the summer so I dug into my scrap bags and played with this idea I had recently come across at this link.
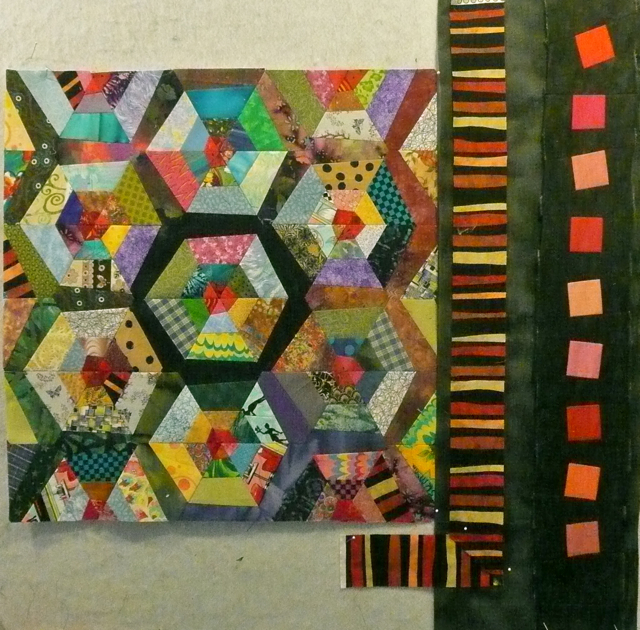
Making my own pattern for the diamond shapes that create these wonky spider webs based on a Victorian motif was easy. Watching it grow on my design wall was fun ...
At this point, it began to be a bit more work to figure out which scraps to use where ...
Further along, I began to think about how in the world all these diamond shapes would be sewn together ... and could see no other way except with "Y" seams. So I finished up with a plan to use this as the center motif for a larger project.

Sewing the "Y" seams was not as bad as I had anticipated. The biggest trick for success is to not stitch into the seam allowances. Also, to backstitch at the beginning and end of each seam ... and each side of the diamond is a separate seam. In these two photos you can see the sequence of my getting those diamonds sewn together.

Here it is all stitched together ... front and back.
As you can see, I marked key diamonds on the paper clad backside so I wouldn't mess up the spider web patterns. The paper was torn away from the seam allowances so they could be pressed before I trimmed the whole piece to size and square it up in preparation for it to be used as the center motif in a future bed quilt.

Last evening I dug through my stash of fabric pieces that had been cut for other projects but had ended up not being used. Among my finds were a baggy full of red hued squares and the cut strips of the striped fabric. Both of those look good with the spider web piece. Ricky Tim's "dancing square" patterning is the perfect wonkiness for working those squares into a border. The same goes for that irregular striped fabric.
It's time to put all this away ... maybe I'll pack it up to finish designing and piecing sometime this summer.

Now to get busy so I can get back to creating in my Studio North.


Saturday, May 05, 2012

More Silk Scarves

The third quilt made from silk scarves is quilted* ...

It's ready for Alicia to hide the thread ends and hand stitch the binding in place. I stood on a ladder to take the picture of the quilt on the floor ... it really is square.

Another use that I've found for beautiful silk scarves is to employ them as covers for my sewing machines between uses. Right now I'm using two floral ones. I may switch them out next fall.
Also, I've wrapped my plain metal lamps with scarves which were hand-dyed by friends. Personally I rarely wear scarves, so I'm glad to have found ways to enjoy having them.

For more ideas of ways to utilize scarves go to this post, "Scarves Aren't Made For Just "Around Your Neck" at this link.

 * To see the other cuddle quilts made with scarves go here.

Thursday, May 03, 2012

Painted Toy Boxes

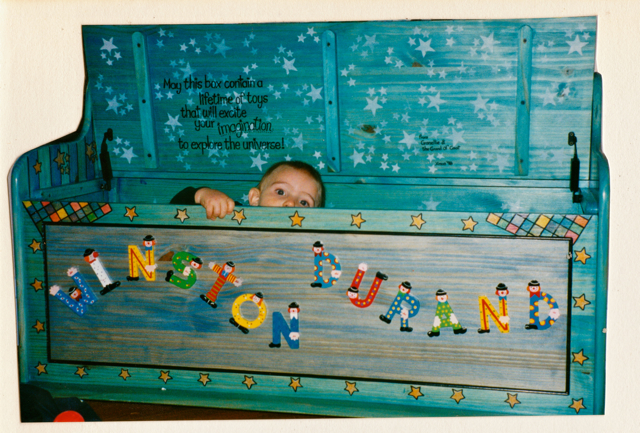
Recently while I was looking for a specific photograph in our family scrapbooks, I came across pictures of the toy boxes I had created for each of our three grandson's first Christmas. The one below is Jackson's.

The three boxes were purchased from an unfinished furniture store. I used Seta Color fabric paint and acrylic medium, plus a big fat Sharpie felt tip pen to decorate them. The paints were diluted with the acrylic medium. I cannot recall exactly why I did that. I think it was because I liked the wood grain showing through the colors. All the design elements were defined by tracing their outlines with the Sharpie pen. The painted wooden letters that spell out each of their names were purchased just as they are. They were glued on after all the other painted designs were finished and several coats of plain acrylic medium had been applied as a finish.

Here is Jenning's ...

...and their cousin Winston's toy box ...
Their grandfather lettered this sentiment under each of the lids ...
The boxes are still in each of their rooms even though they're now teenage boys.


PS: I purchased and installed hinges that are made especially for toy boxes so the lids don't fall shut. Here's a link that carries them.

Tuesday, May 01, 2012

Happy May Day

This quilt that I made a number of years ago presents all the wondrous and happy associations that I have about May Day. I hope your day is carefree and happy.

 "Twist and Shout" - 48"x48" (2000)

To read more about this quilt go here to read a previous post.