Nellie"s Needles

Saturday, November 21, 2009

Woo Hoo! Installation Time!

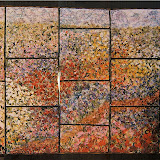
I just heard that "Prairie Performance" will be installed tomorrow. Filming AND photos will be taken during the process. Now I'm excited and nervous. I cannot think of anything more I could've done or that any vital information about where each panel fits into the whole was left out.
I not only drew diagrams on the back of all twenty-five panels to indicate where each is positioned within the arrangement, but included a sheet with written instructions and a photo marked up with the letter and numeric positions. I've got my fingers and toes crossed.

Click here to read a post about the art collection going into this new hospital. I'm honored and pleased to have made it through that selection process. I'll let you know IF "Prairie Performance" is presented on that link in the near future. Any photos of the installation that are sent to me will get posted here.

Woo Hoo!

Tuesday, November 17, 2009

Art Made From Repurposed Materials

Art crafted from objects that were once functional in everyday life appeal to my husband and me. Those with a quirkiness and sense of humor are most appealing. A couple of summers ago we found this whimsical character, "Kramer", in a gallery at Grand Lake, Colorado.
This past summer we purchased another piece by the same artist. The oven thermometer says "kitchen art" to us.
Definite art for the kitchen are these two made with measuring cups as their foundation.
I wish my husband would take this neon lighted message seriously more often.This fanciful creature watches over all from the ceiling.

So, what would you call that blue bowling pin?
The "King" pin, of course.

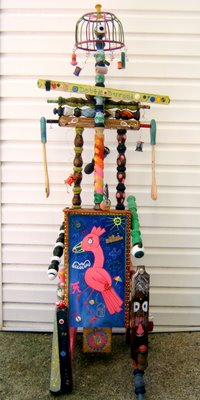
The whole Durand family, members aged 2 to 74, was involved in the creation of this structure during our family reunion a few years ago.
The blue part with the pink bird is the bottom of the drawer that was filled with all those turned pieces I had found for $5 at a garage sale. The "arms" are a pair of wooden salad tongs.

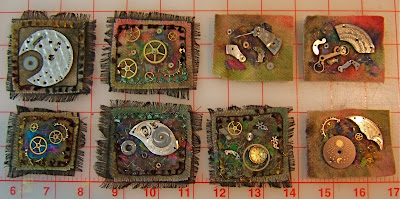
And then there are the brooches I made for my friends out of watch parts.
You won't believe what this artist is creating with nails.
Would you believe this is it?
Note the scale of this piece. There are two people standing at bottom.

This elegant doll from Thailand is made with coins.
One of our favorite art pieces is created by Paula who makes art from salvaged and scavenged materials . The rusted metal part is a railroad plate and the wrapping is cotton string.
Harmony - 6"x 11"

Our older son purchased this clock from Paula. It, too, features one of those railroad plates.
That's Paula of the Self Taught Artist blog. She is presently on a life-changing adventure and making art with a whole bunch of new materials. Click the link above to go to her blog to check out the bone and scrap wood candle tables she recently completed.

Thursday, November 12, 2009

Spirit Doll Party

Today our Thursday bee group had a "Spirit" party to reveal the finished spirit dolls. This included each of us contributing to a buffet of yummy things for lunch. The only spirits to drink were teas. Our dolls pinned to a display board was the center piece at the end of the buffet table
At some point I turned them around to take photos of their backsides.
Eight of us participated in this round robin of dressing and decorating individually made dolls from a pattern I had designed. One of them and her owner, Sandy, were unable to be there.

After lunch each of us presented our doll for discussion by the group. The thing that amazed me was that the completed spirit dolls reflected qualities of their owners. That shouldn't be surprising about those of us who have been long time members, but there were a couple of participants who are pretty new to the group. Each of these beauties speaks pretty loudly about their mistress.

Patty's doll
Tone's doll
Melissa's Doll
Judy's Doll
Deb's Doll
Louise's Doll
Nellie's Doll
I don't have red hair, but I've always wished I did. Tone who gave my doll the dyed cheese cloth locks did not know that about me.

Each of these dolls embody the creative spirit of all who have contributed to them. Mine needs one more contribution ... a name. Any ideas? If your suggested name is selected, it will be rewarded with a gift from my creativity.

Wednesday, November 11, 2009

A Salute to All Veterans

Thank you for the protection of our freedom and rights through your service to our country.

Tuesday, November 10, 2009

Spirit Doll Modification

It's taken me a while to notice that Louise attached her spirit doll's head differently from the instructions I wrote. I like her method better than mine. It results in a more natural position and a chin PLUS it's easier to do.
Complete the seam around the head rather than beginning and ending on each side of the neck. An opening for the neck is made by small criss-cross slits cut in the back of the head at the base of her skull. Make short slits ... the size of them can be increased to accommodate the size of the neck. Push the neck into the opening. The head can be turned and/or tilted in various positions. Secure the positioning with straight pins. Connect the head to the body with the blind stitch/ladder stitch.

Oh, how I wish I had thought to do this on the two dolls I made and in those instructions that more than 100 people have downloaded from Scribd. Hopefully, I'll recall to attach the head this way if I make another doll.

Speaking of another doll, I had forgotten that I had taken photos of Deb's doll before she left my possession.
Her's was the first to get a derrier. Someone else had placed embroidery on her chest so that I couldn't give her "yo-yo" breasts. I like the flower tatoos on her rosy cheeks ... and her purple petal hair is "wild".

I can hardly wait to see the rest of these beauties at the "Spirit Party" on Thursday. Photos will be posted that night. You may have noticed that I've added a Picassa album of them in my sidebar. Just click on the picture to access it. I'll add photos of dolls made by any of you out in cyberland to that album if you send me a picture or a link where I can find it.

Saturday, November 07, 2009

Spirit Dolls In the Prairie Flowers

This past week my spirit doll returned home after making the rounds of SMQ Guild's Thursday bee members participating in this project.
So I've been working on her a bit. I stitched her hands together so she can hold the acorn gift that Susan Lenz gave me when I met her in South Carolina last January.

She gained breasts and a derriere made in the "yo yo" technique ... the gathered side placed up and decorated with wood beads for her top while they're placed down to give her a smooth bottom. I also lengthened her tutu skirt by dropping it down and suspending it with lengths of yarn from her waist. A layer of leaves cut from the piece I made for this quilt is sewn to her wings.
The other spirit doll with lovely hair is the last one passed to me. One of my additions was to lengthen her tutu by stitching silk flower petals to the hem. While I was at it, silk blossoms with silk ribbon centers were added for decoration.
She, too, gained a yo-yo derriere. Her skirt is parted to give you a better view.
I couldn't resist posing them in front of the two latest prairie flower mini quilts.

All the spirit dolls will be brought to bee next Thursday. Come back then to see pictures taken of all these beauties at the "spirit" party.

Wednesday, November 04, 2009

More Mini Prairie Flowers

More mini quilts made with the pieced together cut-offs from "Prairie Performance" as their foundation have been created.
I position the main elements, such as the blossom, stems, leaves, and of course Elvis on the background first so I can determine a "point of view" or perspective. Those get removed so the background can be filled in with more scraps of thread and fabric. A layer of netting is laid over that and then it gets quilted.
Most of the flowers and leaves that are the focal point or in the foreground are machine appliqued onto the surface so they're dimensional.


That makes 12 of the 20 I intend to make. Five of my friends who've contributed scraps that were used in the prairie flower installation received their quilts after our SMQ Guild meeting last evening. One got hers last weekend when we were in the mountains. Tomorrow several more will get their's at Thursday Bee. Only 8 more to make.

PS: Did you find Elvis in each of those?

Monday, November 02, 2009

Stitching In the Smoky Mountains

Every fall we spend a long weekend up in the Smoky Mountains with a group of friends.
Last year Judy and I transferred some of the colorful fall leaves to fabric. That can be read about here.
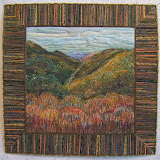
After that weekend last fall my piece of muslin imprinted with those leaves ended up in this art quilt. Go here to read about its creation.
It's what I took up there this year to work on
while enjoying the fall colors in that expansive view of the Smoky Mountains from the big porch that wraps around two sides of the house.