"Home Is Where the Heart Is" House Block
I spent Sunday making seven of these blocks in response to Beena's call for help.
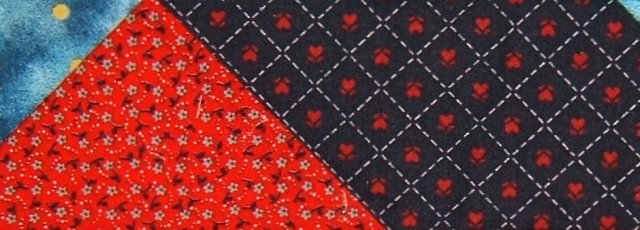
Making them also served for me to honor a friend who died several years ago. Her husband recently gave me a small stash of fabrics that she had collected to make valentines. You may recognize all those, except for the sky, as being from the late 70's or early 80's. They are perfect for this block and my friend would've loved them. All the while they were being sewn, "Home is where the heart is" kept running through my head.
I used the house block design that Beena made up. She has written out instructions on her page.
However, the strip that contains the roof line is full of tricky angles that I prefer to accomplish with paper piecing.
Here the seamline falls along an edge of the diamond pattern in the roof fabric. Also, the outside edges of the sky triangle are on the straight of the grain.
It's necessary to have a way to see through the two layers of fabric and paper. A light box is best*, but a well lit window or bright lamp will work.
Fold the paper to the back along the pattern line between the piece that's already there (roof) and the one to be added (sky) to the back.
Over the light box position the seamline fold on the paper where it needs to be on the roof fabric.
Next position the sky fabric under the paper triangle pattern. The grain lines of the fabric and seam allowance can easily be seen. Hold all the layers together in this position until time to sew.
Flip open the paper foundation piece. Stitch along the pattern line.
Fold the paper back again to trim the seam if necessary.I added the peak of the house next...the red part. Pretend the blue part that's the sky is not yet sewn to the strip.
The paper pattern is folded back along the seam line where the peak will be joined to the roof. The shape and orientation of the fabric for the peak is positioned under that folded back triangle.
I leave the paper folded back until I'm right at the machine to sew the seam through all the layers.
I cannot tell you how many times I've second guessed myself and sewed along the wrong line when that paper has been flipped opened before it was ready to go under the needle. After each seam is stitched, trim any excess from the seamline. Also, press the seam flat.
The whole block was constructed with the paper foundation piecing technique. As you can see, I used newsprint from the Sunday paper. I had stapled 7 layers together and drawn the pattern on the top one. Machine stitching along the lines with no thread in the needle marked the pattern lines in all the paper blocks. It's necessary to indicate either "front" or "back" on those blocks. I do that before taking each one from the pack. I also mark the outside edge of the block so I know where the straight of grain should lie. Those are the arrows you see in the photos above.
Until I discovered this sequence of folding and stitching the foundation piecing method was sooooo frustrating. There were many ripped seams and discarded fabric pieces that I had wrongly thought were the right size or shape. Also, if there were a pattern in the fabric that I wanted to showcase, getting it in the right position was a matter of luck. I was also happy to be able to control the grain line on the outside edges of the block. There are many sources that state the grain line is of no consequence for this method of piecing, but I disagree.
*There is no extra space in either of my studios for a light-box. The solution that works for me is a lamp placed under the acrylic extension for my sewing machine.
 A big PLUS for this arrangement is that there are only inches between all that figuring out, folding, and unfolding and sewing the seam.




 Fabric Bird Sculpture Pattern


5 comments:
Oh yeah, I recognize those fabrics! I still have too many of them, but I'm making some headway on using them up in scrap quilts.
Nice job on the house block!
the house looks adorable! thanks for sharing your paper piecing tips! 7 you made! your a doll thank you so much!
Victoria
Lovely house block Nellie and such clever piecing which adds so much to the design.
Thanks for the tutorial. I have always disliked paper piecing because I keep getting it wrong. Maybe now I'll try again. I never thought of using my extension as a light box! Great idea.
You made HOW MANY in a day? Whew! I loved reading your description and photos of your paper patterns and piecing. I remember so well helping my mother do this. At the time, I hated this--I wanted to go out and play! Of course, I find now that all those lessons paid off, although I'm not as precise as you or my mother!
Post a Comment