Nellie"s Needles

Tuesday, May 08, 2012

Playing with Paper Piecing

I had a few days between my last big project (more about that later) and getting ready to move north for the summer so I dug into my scrap bags and played with this idea I had recently come across at this link.
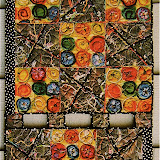
Making my own pattern for the diamond shapes that create these wonky spider webs based on a Victorian motif was easy. Watching it grow on my design wall was fun ...
At this point, it began to be a bit more work to figure out which scraps to use where ...
Further along, I began to think about how in the world all these diamond shapes would be sewn together ... and could see no other way except with "Y" seams. So I finished up with a plan to use this as the center motif for a larger project.

Sewing the "Y" seams was not as bad as I had anticipated. The biggest trick for success is to not stitch into the seam allowances. Also, to backstitch at the beginning and end of each seam ... and each side of the diamond is a separate seam. In these two photos you can see the sequence of my getting those diamonds sewn together.

Here it is all stitched together ... front and back.
As you can see, I marked key diamonds on the paper clad backside so I wouldn't mess up the spider web patterns. The paper was torn away from the seam allowances so they could be pressed before I trimmed the whole piece to size and square it up in preparation for it to be used as the center motif in a future bed quilt.

Last evening I dug through my stash of fabric pieces that had been cut for other projects but had ended up not being used. Among my finds were a baggy full of red hued squares and the cut strips of the striped fabric. Both of those look good with the spider web piece. Ricky Tim's "dancing square" patterning is the perfect wonkiness for working those squares into a border. The same goes for that irregular striped fabric.
It's time to put all this away ... maybe I'll pack it up to finish designing and piecing sometime this summer.

Now to get busy so I can get back to creating in my Studio North.


Saturday, May 05, 2012

More Silk Scarves

The third quilt made from silk scarves is quilted* ...

It's ready for Alicia to hide the thread ends and hand stitch the binding in place. I stood on a ladder to take the picture of the quilt on the floor ... it really is square.

Another use that I've found for beautiful silk scarves is to employ them as covers for my sewing machines between uses. Right now I'm using two floral ones. I may switch them out next fall.
Also, I've wrapped my plain metal lamps with scarves which were hand-dyed by friends. Personally I rarely wear scarves, so I'm glad to have found ways to enjoy having them.

For more ideas of ways to utilize scarves go to this post, "Scarves Aren't Made For Just "Around Your Neck" at this link.

 * To see the other cuddle quilts made with scarves go here.

Thursday, May 03, 2012

Painted Toy Boxes

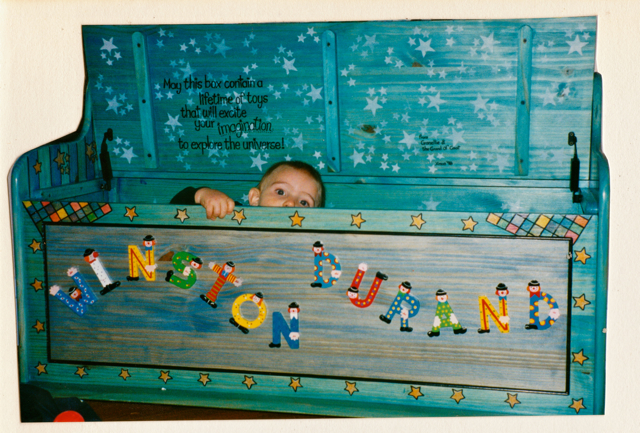
Recently while I was looking for a specific photograph in our family scrapbooks, I came across pictures of the toy boxes I had created for each of our three grandson's first Christmas. The one below is Jackson's.

The three boxes were purchased from an unfinished furniture store. I used Seta Color fabric paint and acrylic medium, plus a big fat Sharpie felt tip pen to decorate them. The paints were diluted with the acrylic medium. I cannot recall exactly why I did that. I think it was because I liked the wood grain showing through the colors. All the design elements were defined by tracing their outlines with the Sharpie pen. The painted wooden letters that spell out each of their names were purchased just as they are. They were glued on after all the other painted designs were finished and several coats of plain acrylic medium had been applied as a finish.

Here is Jenning's ...

...and their cousin Winston's toy box ...
Their grandfather lettered this sentiment under each of the lids ...
The boxes are still in each of their rooms even though they're now teenage boys.


PS: I purchased and installed hinges that are made especially for toy boxes so the lids don't fall shut. Here's a link that carries them.

Tuesday, May 01, 2012

Happy May Day

This quilt that I made a number of years ago presents all the wondrous and happy associations that I have about May Day. I hope your day is carefree and happy.

 "Twist and Shout" - 48"x48" (2000)

To read more about this quilt go here to read a previous post.

Sunday, April 22, 2012

Recycled Scarves

This being "Earth Day" makes it most appropriate to post about this project that my friend, Alicia, and I have worked on this past week during her annual visit from Milwaukee. We designed and created cuddle quilts as Christmas presents for three of our mutual friends from silk scarves she had inherited from close friends. Two of the recipients are daughters of one of them while the other one was friends of both owners of the scarves. Here's the back and front of our first creation ...
 These are the scarves we selected for the one above and our method for designing the quilts ... just folding and laying out the chosen scarves on the floor.
After we had an idea of what we were going to do, I had taken photos of the three scarf quilt layouts which we took shopping to find other fabrics to fill in borders and for quilt backings. The general size for all of them is 60" square ... or a bit less.

Here's our second silk scarf cuddle quilt ...
The center blue square is a whole scarf. The four large flowers in the corner blocks were cut from a long rectangular one that had six of them. The borders with the squares are from Thai silk curtains and the violet satin border was someone's excess upholstery fabric ... both had been passed onto Alicia. The lighting for the picture I took of the back side really distorted the actual hues ... especially the border which is a deep red cotton with tiny black dots while the center square is deep blue and violet cotton batik.

And here's our third one in the "layout" stage ...
I've already pieced the top and backing and it's in the process of being pinned for me to machine quilt*. I've done most of the cutting and machine work while Alicia has starched and ironed (the secret to working with slippery, sliding fabric) and hand-stitched the bindings.


The first quilt from silk scarves is this one I made for Alicia as a Christmas present several years ago. The story about it is here.

*Go to this link to see the 3rd silk scarf quilt almost finished.