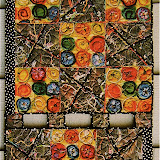
Back in November my daughter-in-law, Terra, called for advice about how to involve children from two classes in creating a quilt for their teacher who's expecting a baby in February. I advised her of several methods for drawing pictures on fabric, which included special crayons and paints, as well as type of fabric. She shopped and experimented. After deciding on what would work for this project, she spent class time, with the aid of the school's art teacher, to guide the kids in drawing pictures for individual blocks of the quilt. During the holidays, she and I had the pleasure of making those drawings into this quilt that's just been presented to the teacher.

She is thrilled with the gift of this two-sided quilt ... the orange bordered side features one class of student drawings while the brown polka-dotted bordered side is made up of the other class's.
My twin grandsons, who are two of the students in this teacher's classes, helped with the heat setting of the drawings into the fabric as well as ironing the fabric chosen for the sashings, corner blocks, and borders.
If the construction hadn't been complicated, I would've had them sewing as well.
All the vertical rows of blocks for both sides were first sewn together. Then the quilt was constructed with a "flip and sew" technique. This is a method that is a lot easier to do with a one-piece backing fabric, the batting, and the pieced rows for the top. It was a challenge to align the rows for the front and back with the batting sandwiched between. Finally a photo was taken as I was sewing the last rows onto the quilt. In the picture below you can see me pinning a row in place. It's lined up with and being pinned to the rows of blocks on the front AND back sides.

My next step was to turn all this over and then to pin the corresponding row of blocks right sides together to the other side of the quilt through all the same layers. Then I machine sewed a seam through those four layers of fabric with the batting sandwiched in the middle. I decided to construct it like this because I could figure no other way to quilt it that would keep the blocks on the front and back aligned with each other.
This presentation is the first time the class got to see the result of their creations. I think they're pleased as well.


 Fabric Bird Sculpture Pattern


