Making the Shoes
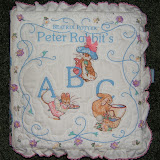
This little 4"x6" book is the inspiration for the shoes featured in "Imelda's Dream" as well as a number of small wall quilts. The sticky notes mark the ones that were favorites.
This is the Christian Louboutin shoe that especially intriqued me. Its silhouette is the ideal for a pump in my opinion. There is a classic elegance to this one. The curve of the heel is so graceful and sensuous. This pump looks like it would hug the foot so it would feel like it belonged there. Oh, I wish I could wear this one. Well, maybe not. I would never spend the money to buy it. Louboutin shoes are mega $$$$$.
So, instead I had a fun time dreaming up variations of my own. Many of them have already been posted. Making these shoes was like eating peanuts. As each one was created it got pinned to my design wall. I hadn't a clue how they were going to be used at that time.
To make a pattern I scaled up the picture from 5"s to 8"s. I did this by tracing the picture in the book and then drawing a grid over it. I then drew an enlarged grid on another piece of paper and drew the shoe within it, duplicating the smaller drawing in relation to the grid.
The drawn pattern was refined and transferred to the paper side of freezer paper. I cut this last drawing apart into the structual elements of the shoe. This gave me the option to play with the pieces to create a great variety of shoes from just this one pattern. Some have a different fabric for each separate piece while others have several paper pattern pieces combined to make one part of the shoe.
The pattern pieces were ironed to the front side of fabric. Then I cut out the pieces leaving an 1/8" edge on the sides where "allow"(ance) is written. Phooey, I see that I got the upper foot (vamp) pattern piece upside down in the photo. The fabric pieces were put together while the freezer paper pattern was still attached. Tiny dots of glue were applied to the "allow" edge. It was easy to align the matching piece. I waited to remove the freezer paper until after the glue dried. A new pattern needs to be cut when the wax wears off the freezer paper ... after about six shoes. That was when I decided to flip the drawing to reverse the direction of the shoe.
I drew a box on freezer paper that a pair of shoes in the size I made would fit inside. It was cut apart on the lines and constructed in the same technique that was used to make the shoes.
Stay tuned for more construction techniques for this quilt, as well as the shoes that haven't been featured in a posting yet.
All photos are clickable for you to view a larger version in a separate window. Click the back arrow icon of your server to get back to this post. The highlighted text is also clickable to take you to the link or posting that is being referenced.
1 comment:
How fun to see how you went about designing your shoes and shoe boxes! Looking forward to more...
Post a Comment